How to install BlackArch in USB with persistence!
Best Guide, avoid problems

Requirements
To install BlackArch on a USB with persistence, we need the following:
[!Note] Requirements
- We need 2 USB drives, one to install the ISO and another to install BlackArch with persistence, meaning it will boot BlackArch every time we plug it into the corresponding laptop/PC.
- Minimum 8GB USB to install the slim ISO
- USB +100 GB, essential; otherwise, the installation will fail. It’s recommended that the USB be 3.0 for optimal performance.

Installation
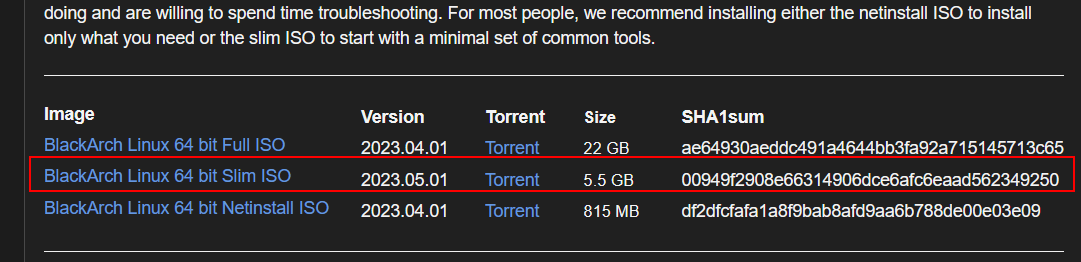
First, download the ISO from the following link:
To install it on the USB, we need to use software like BalenaEtcher or Rufus. Preferably Rufus, as that is what I will use during the installation:
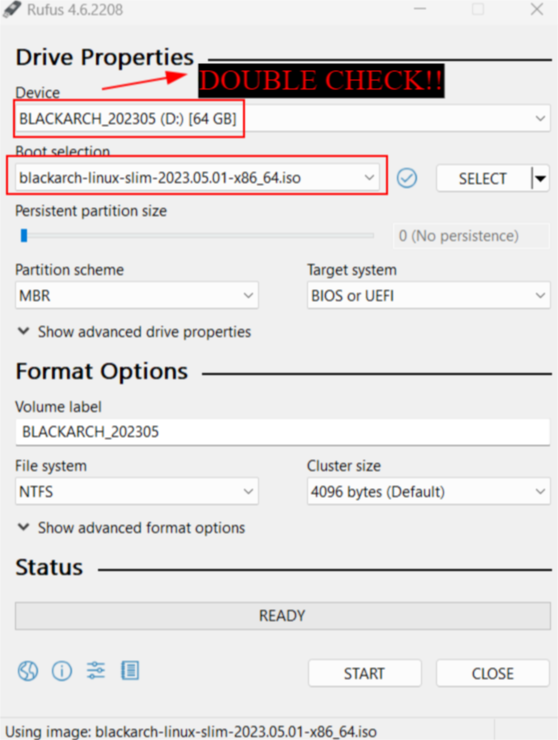
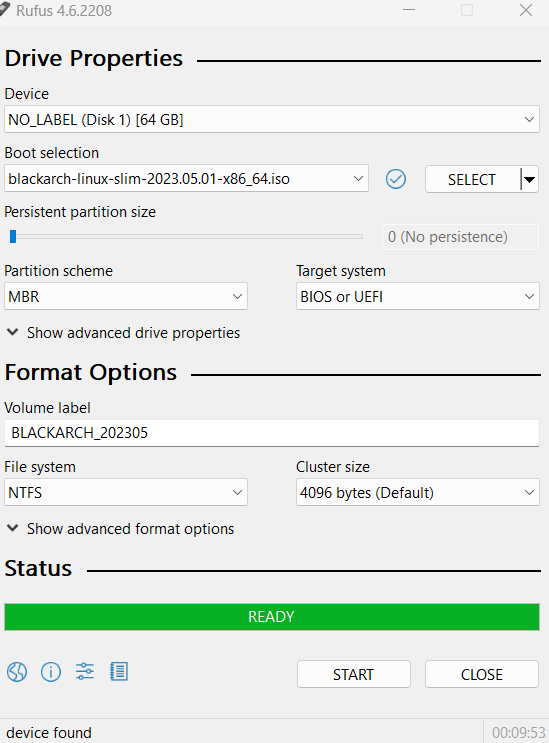
Once Rufus is installed on our computer and the ISO is downloaded, open Rufus, select the corresponding USB, select the recently downloaded BlackArch ISO, and click Start.
[!info] Note
- Although the installation shows a 64GB USB, I eventually used a 128GB one due to installation issues.
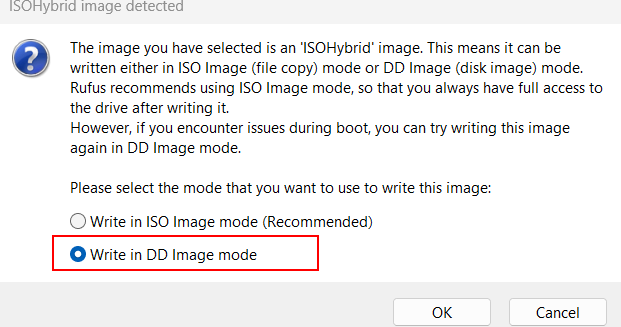
Here, it is important to select the DD Image mode writing mode; otherwise, the installation won’t proceed correctly using the ISO mode.
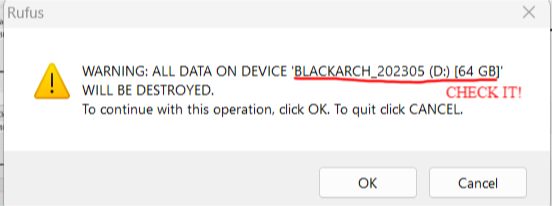
Again, make sure you have selected the correct USB, as the warning mentions, all files on the selected USB will be erased.
Once ready, close it and proceed as follows:
With the USB still plugged in, restart the computer, and as it powers back on, depending on the type or model of BIOS in your laptop/PC, press F2, F11, F10, DEL, or ESC—the most common keys for accessing the BIOS. Here’s a mini cheat sheet:
- Acer: F2
- ASUS: F2
- Dell: F2
- HP: F10
- Lenovo: F2 or Fn+F2
- MSI: Del
- Samsung: F2
- Toshiba: F2
Next, go to Boot Manager and select the USB. 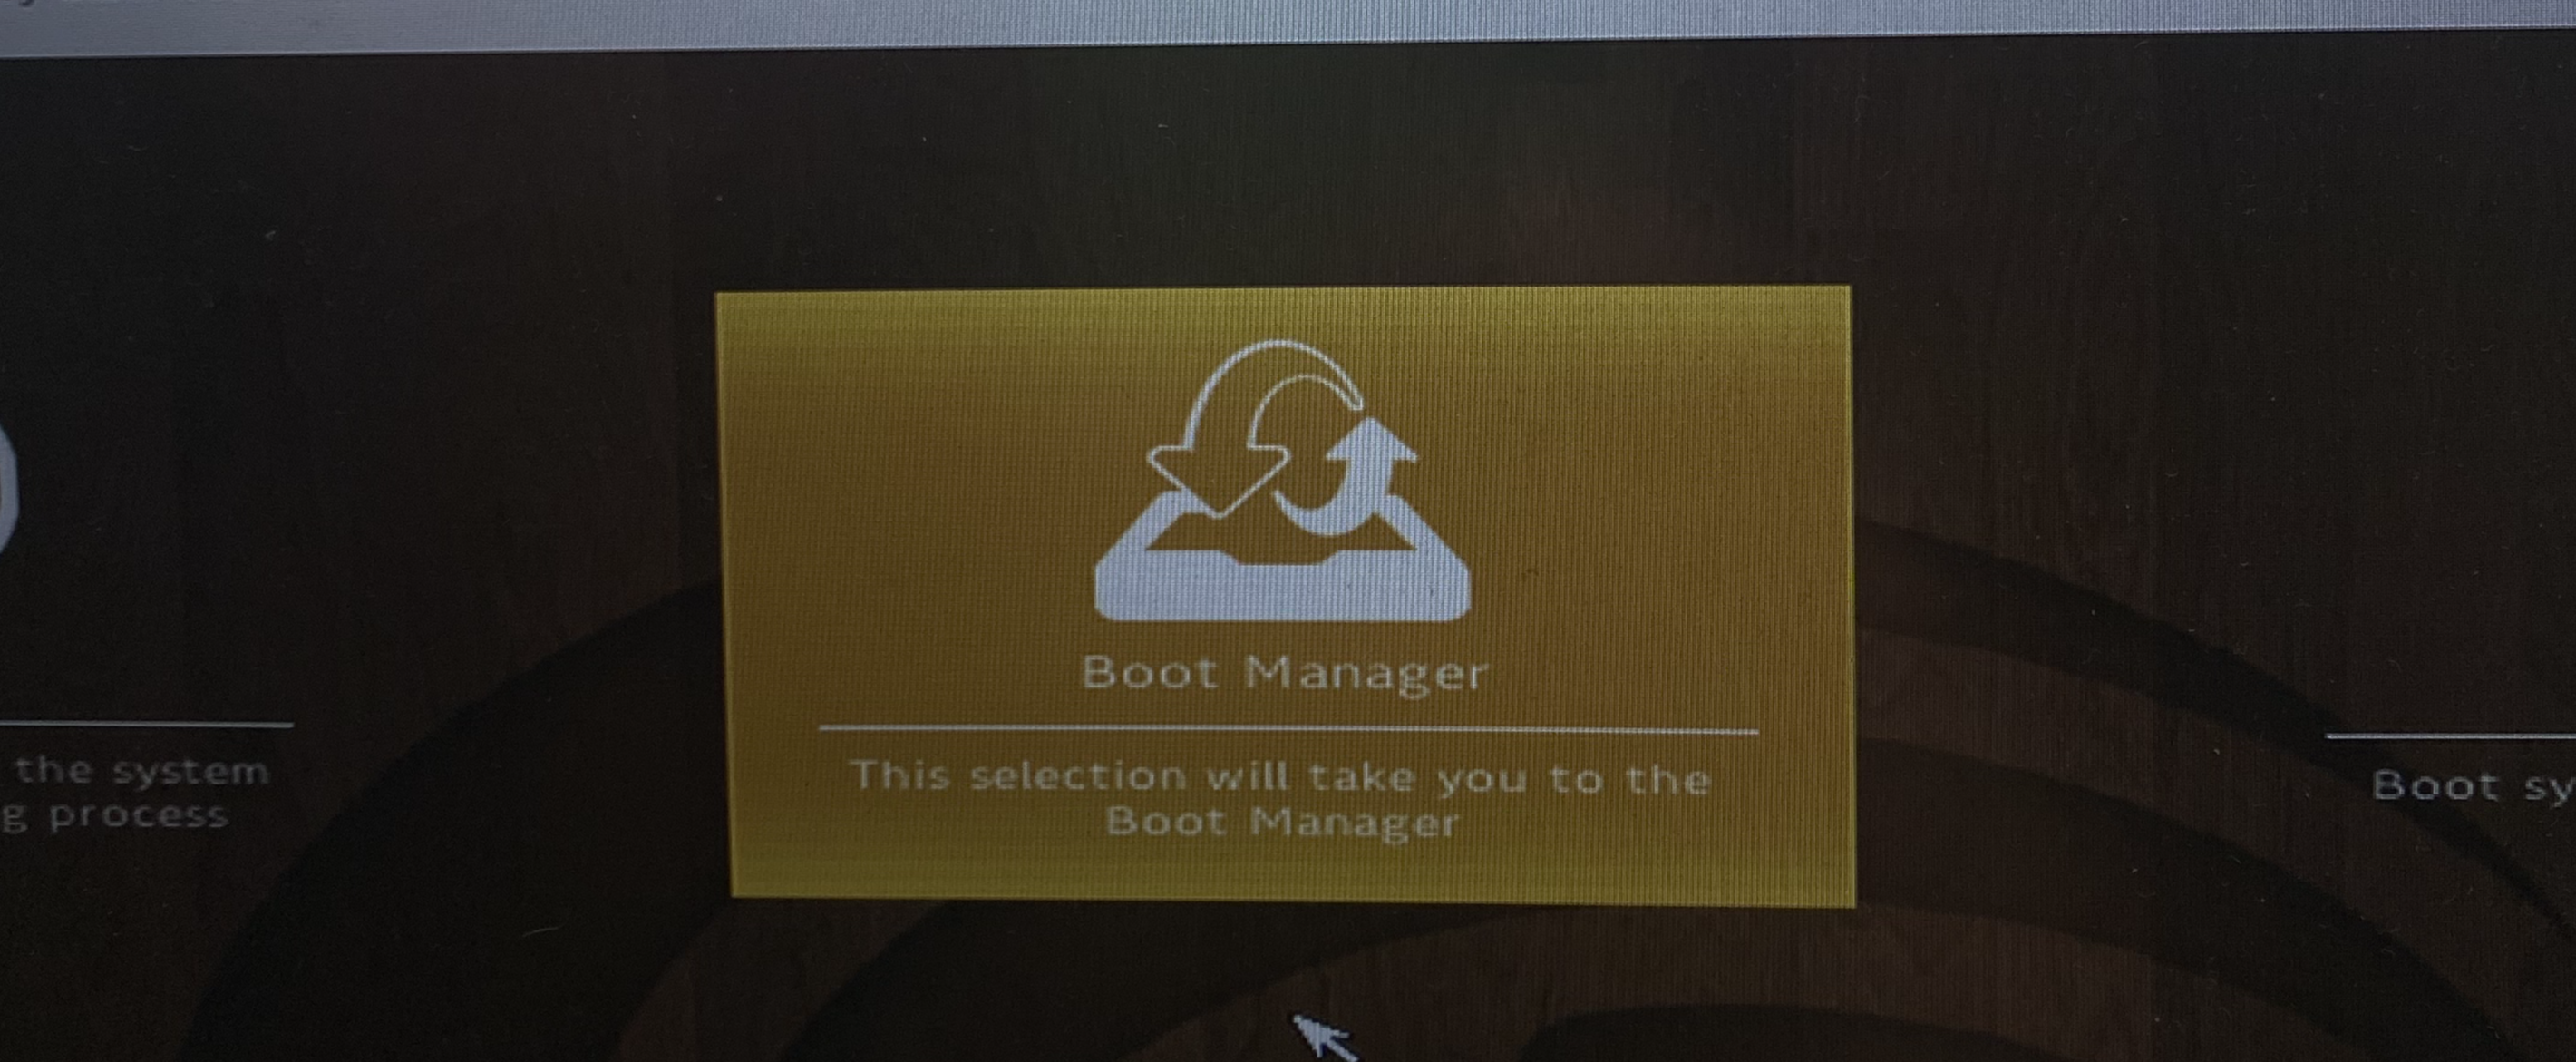
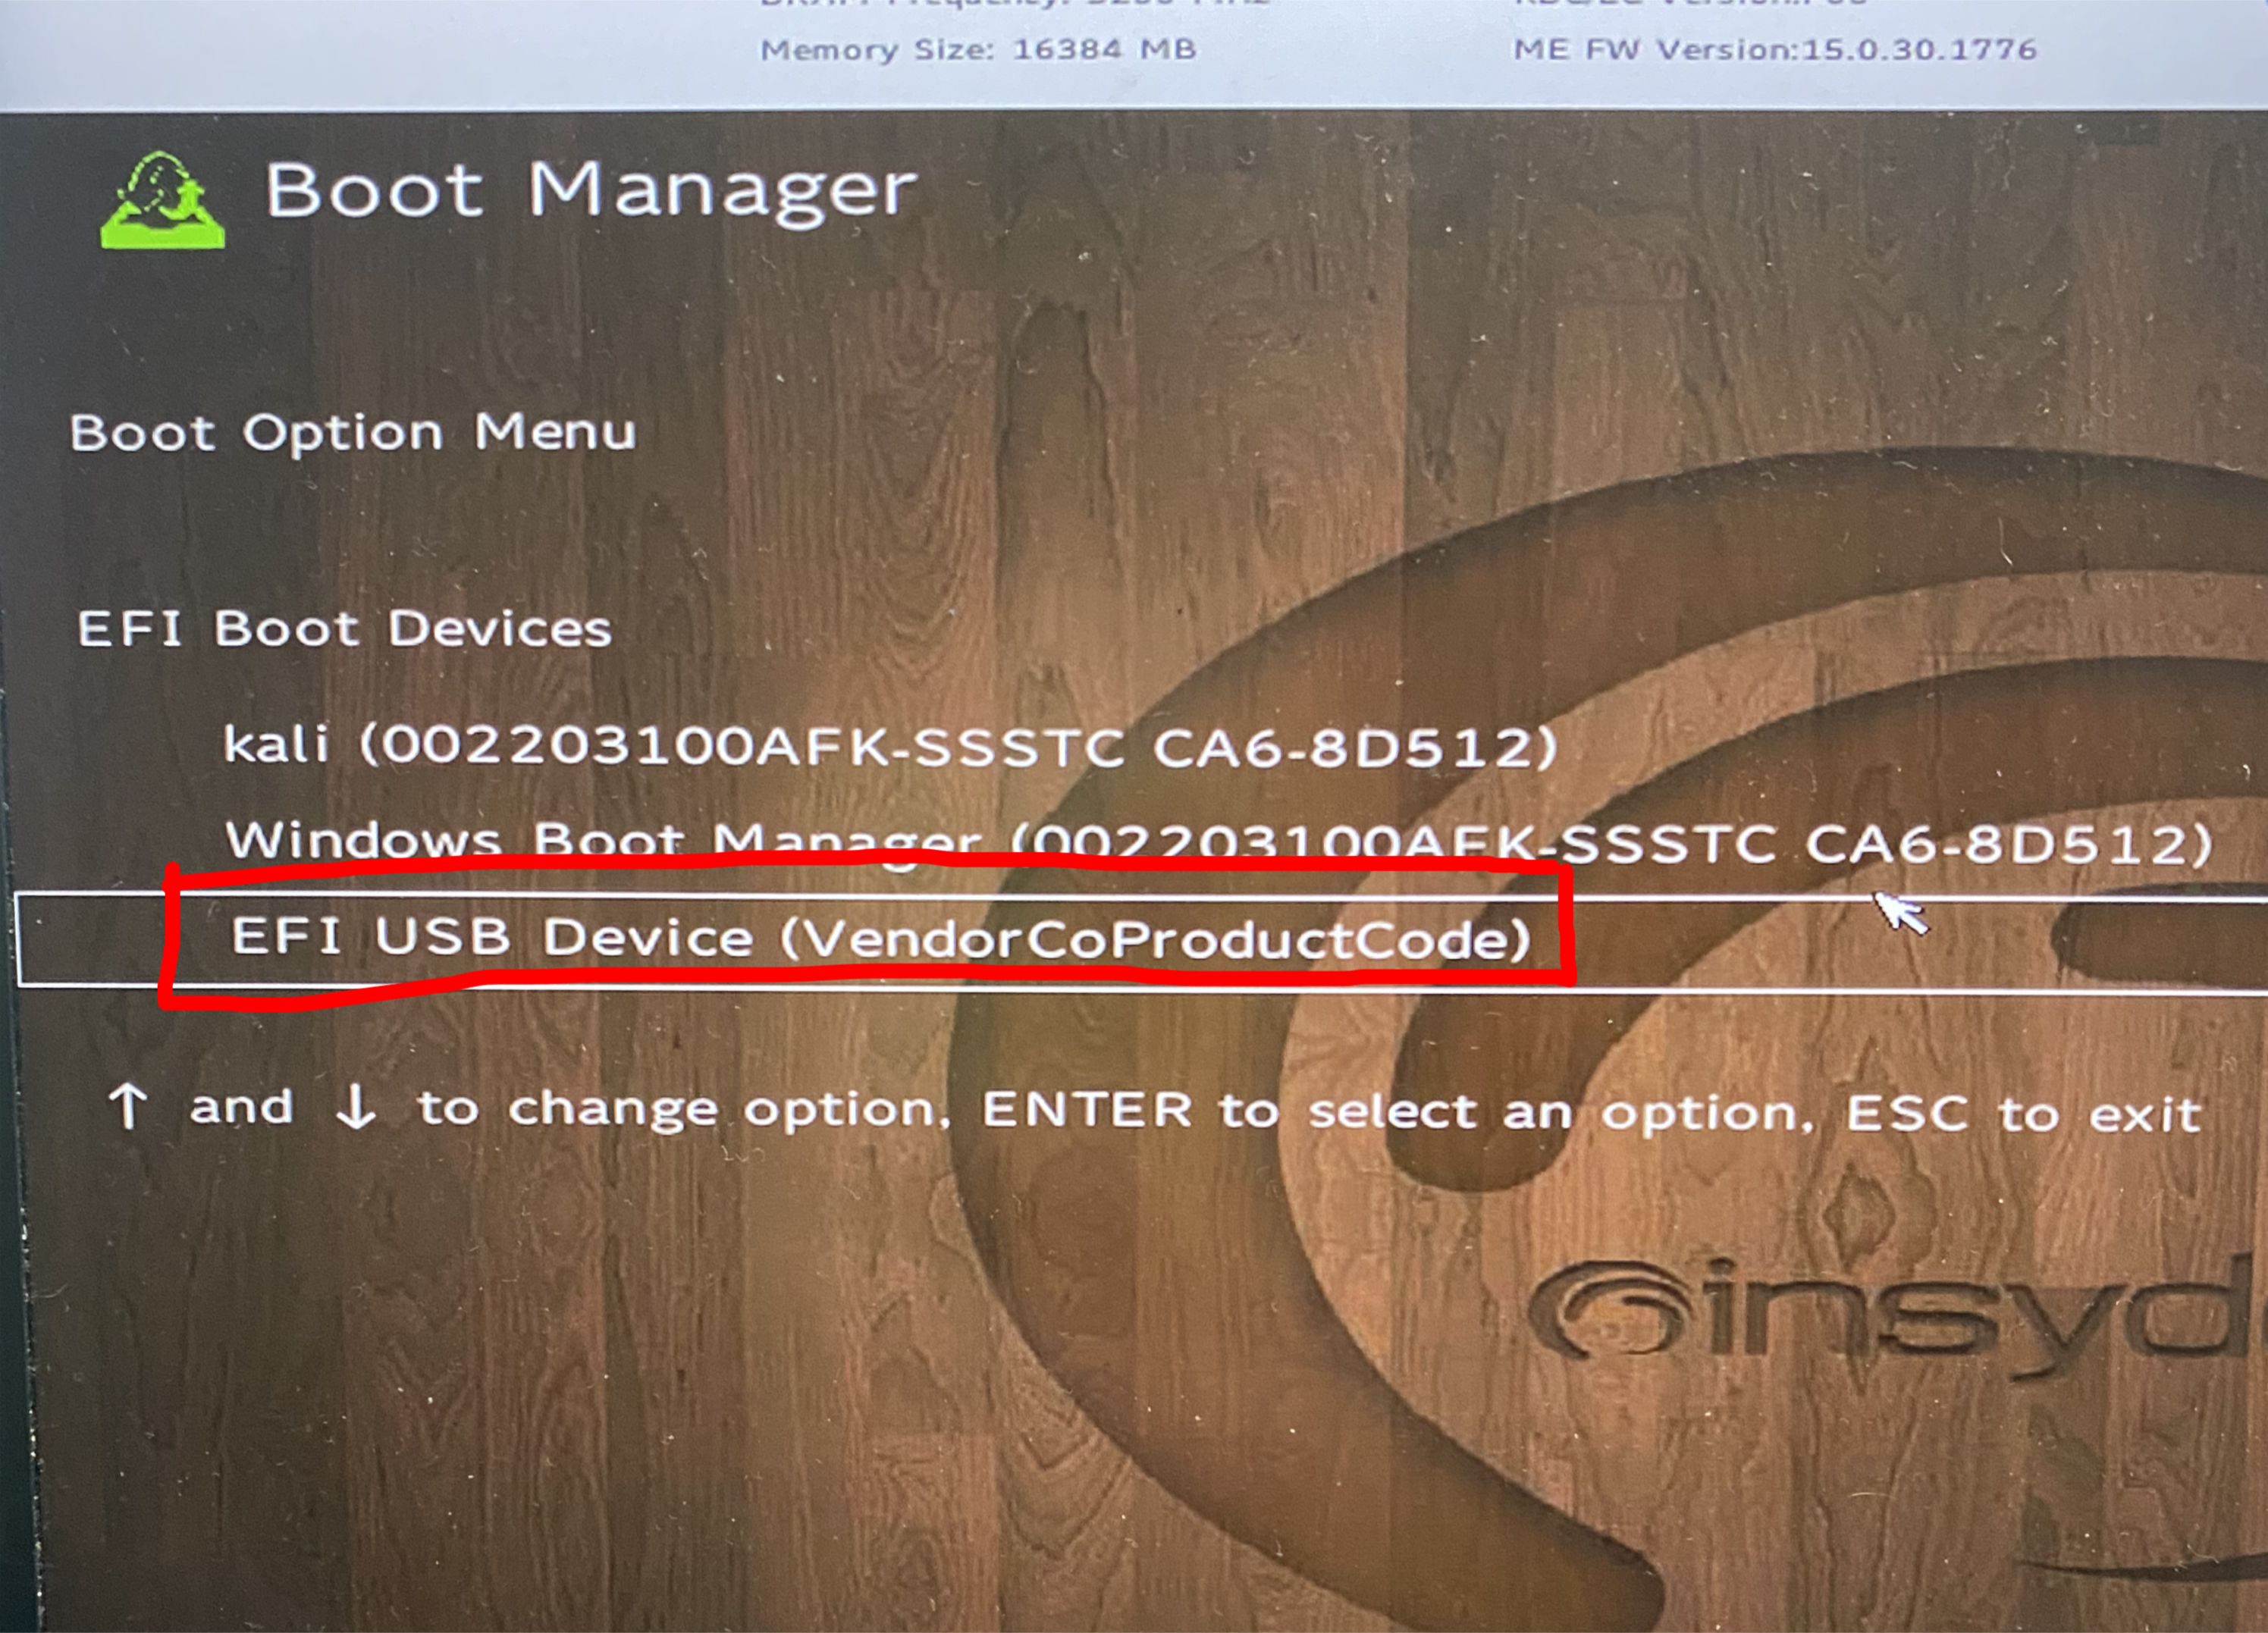
Once selected, choose the second option, and the installer will start.

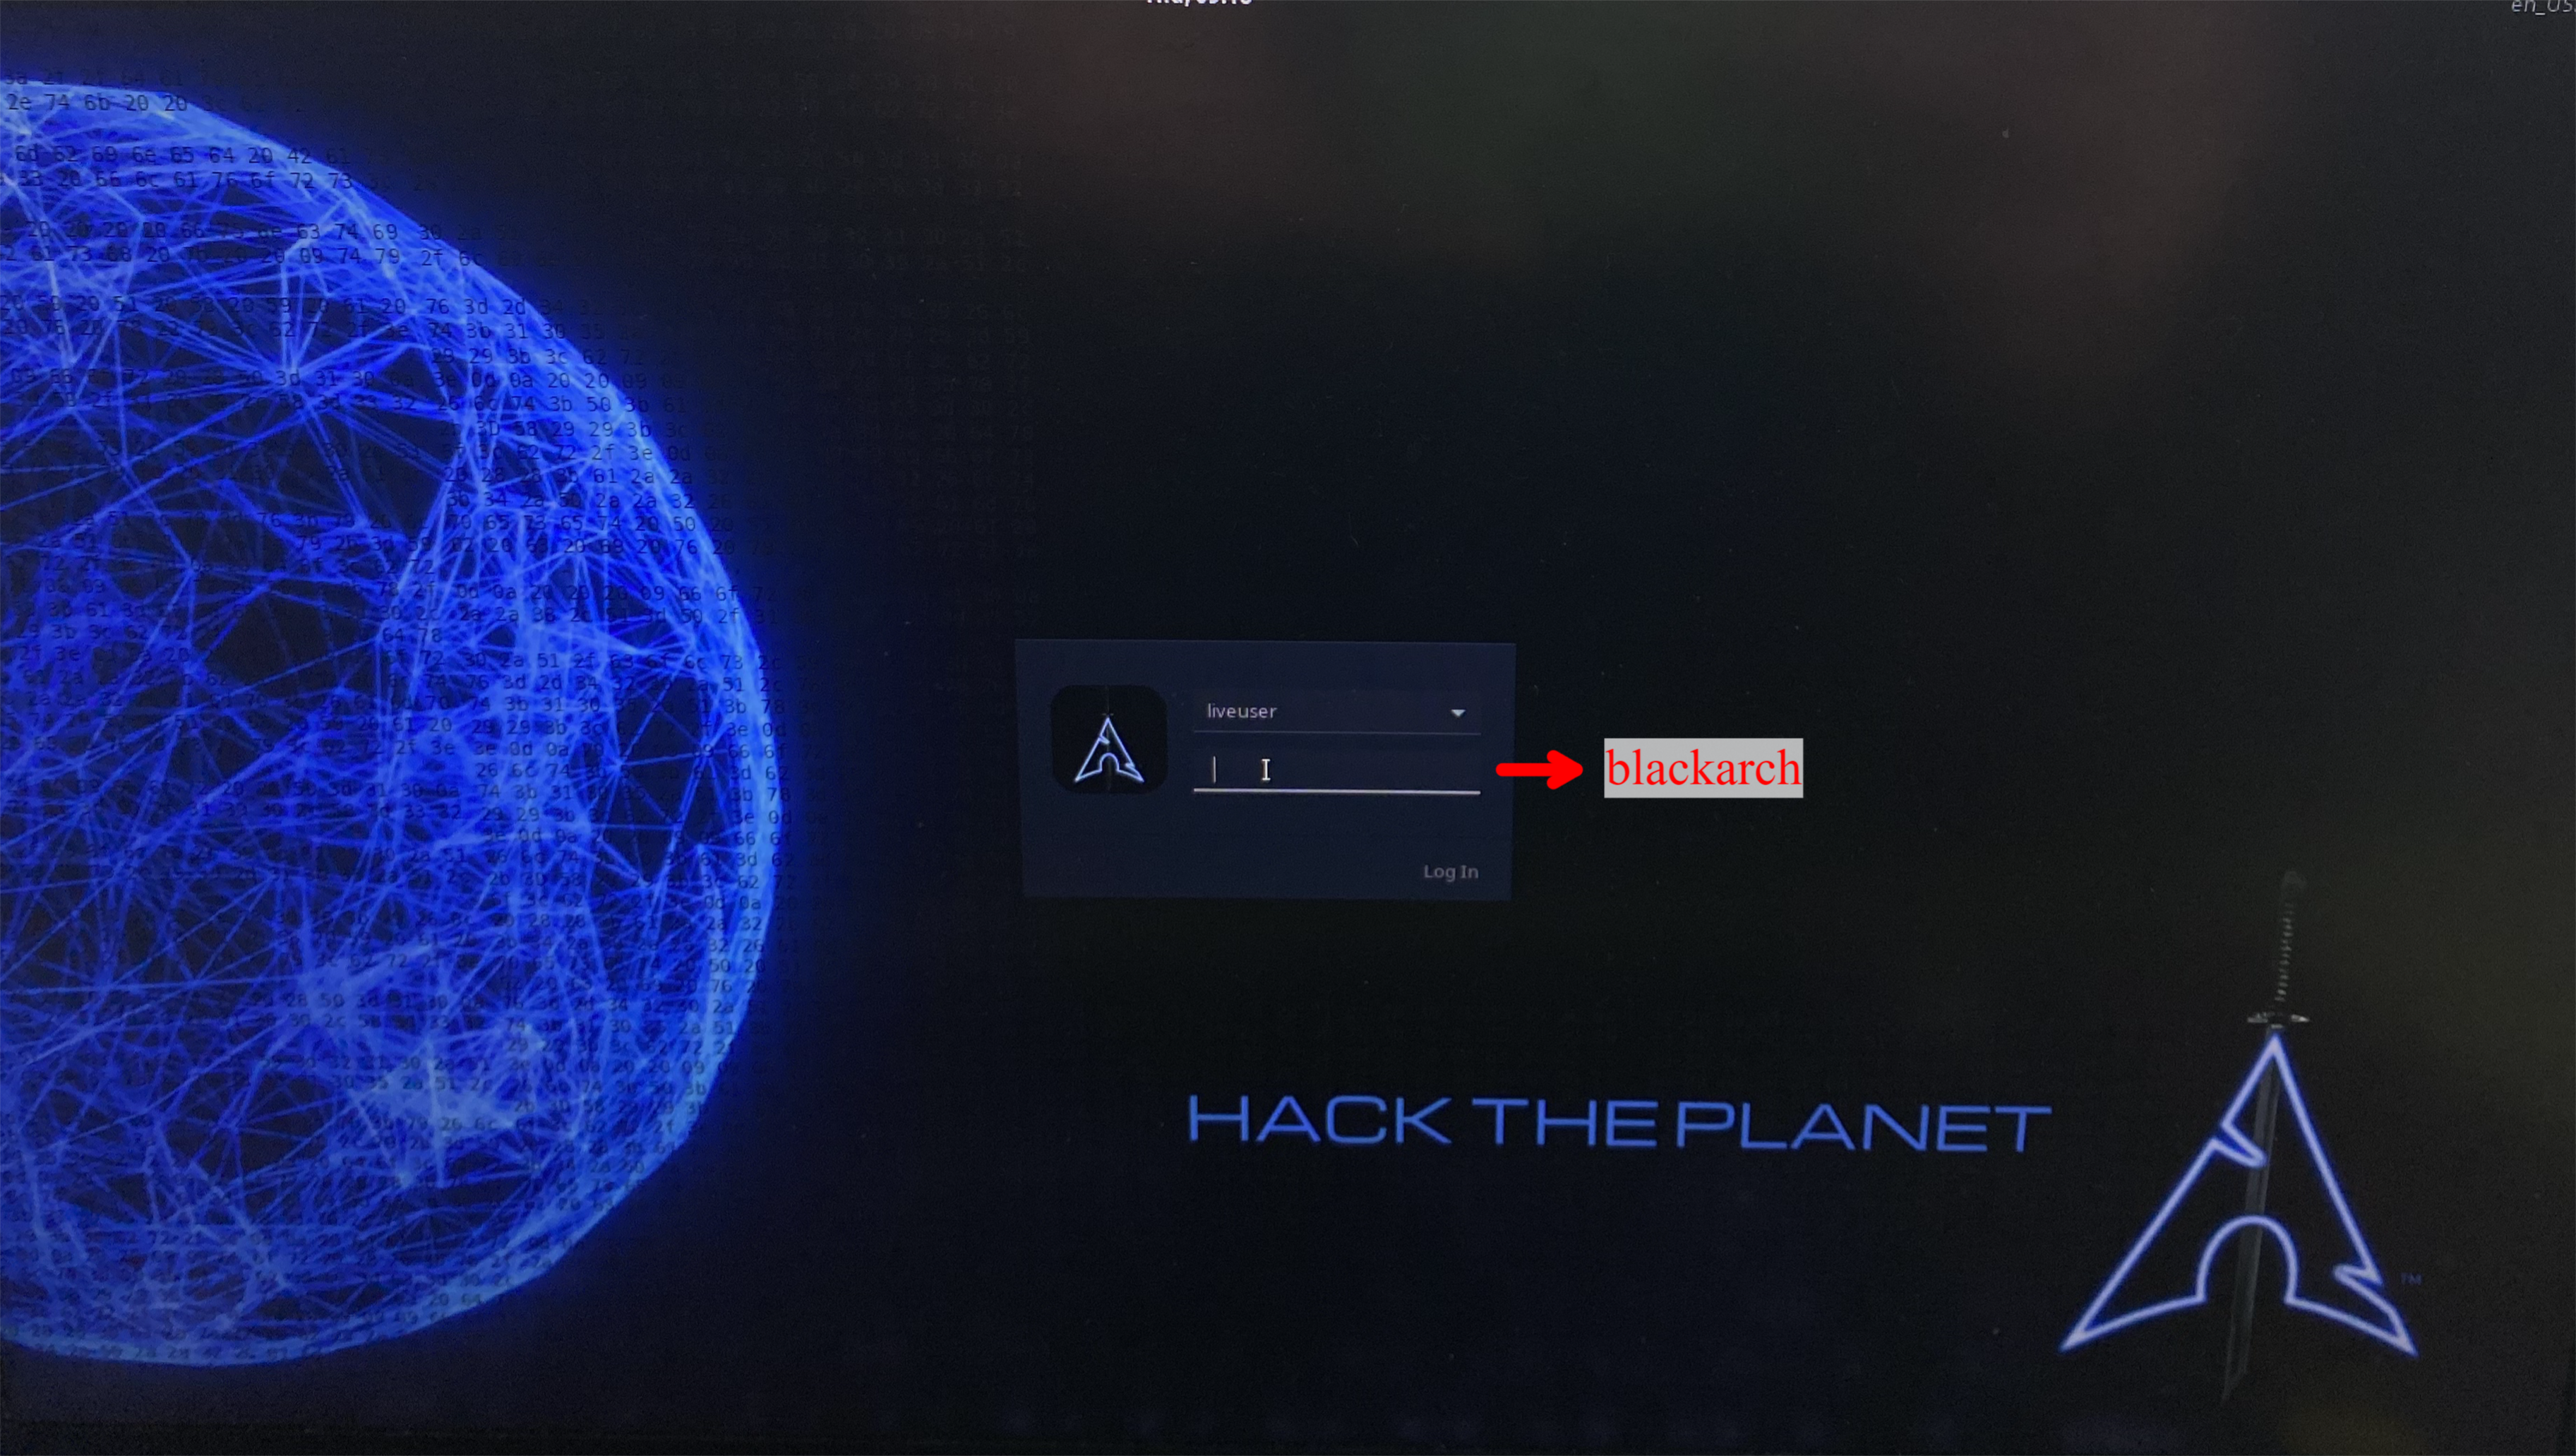
Once inside, DO NOT UNPLUG THE USB, connect the other USB where BlackArch will be installed and log in.
[!Note] Credentials
Login: liveuser
Password: blackarch
After logging in, please consider the following:
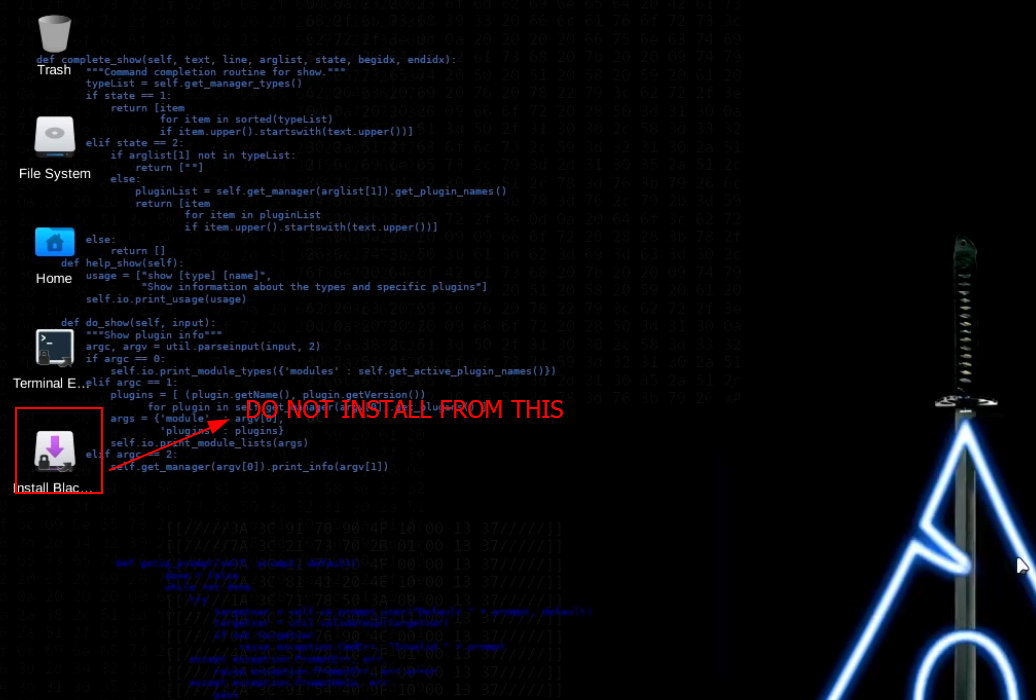
- It is important NOT to start the installation from the desktop installer, as this might cause issues.
- DO NOT connect to a Wi-Fi network with Internet access, as errors with pacman may occur during the installation, causing it to fail. The pacman errors will be resolved later.
- Keep the computer plugged into power during installation, as the process might take MORE THAN 2 HOURS!!!!.
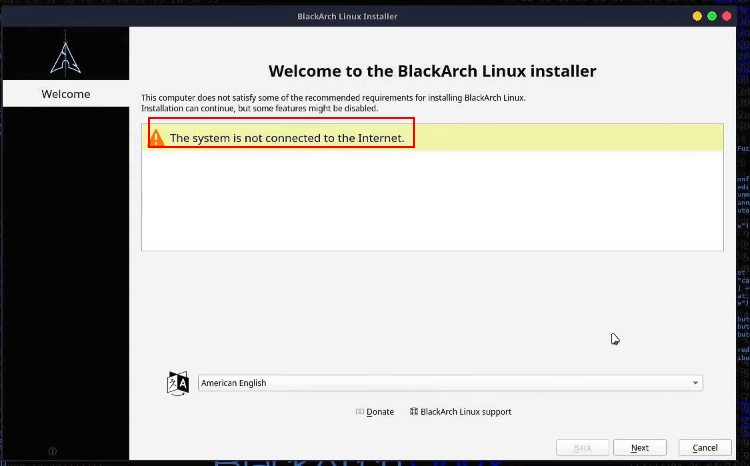
For the installation, open a terminal and run the Calamares installer with sudo.

The installer will open. A warning might pop up about not being connected to the Internet, but that’s okay, select the language and continue.
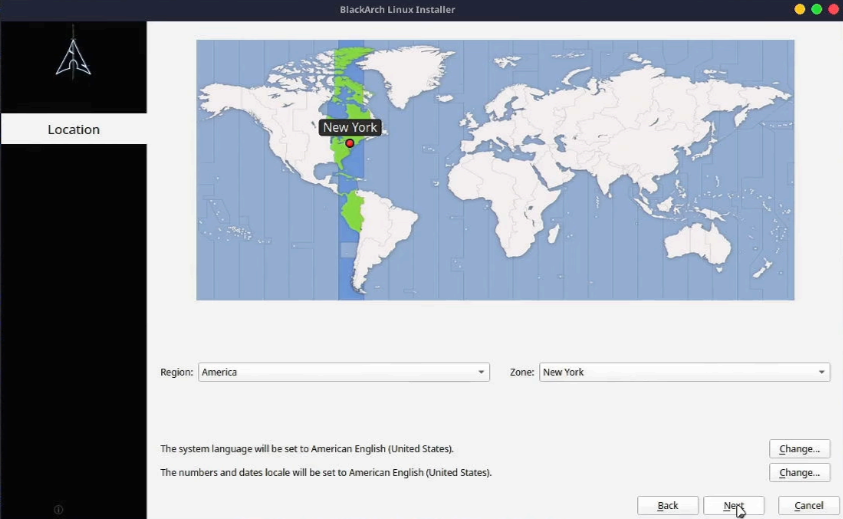
Next, select your location, whatever it may be.
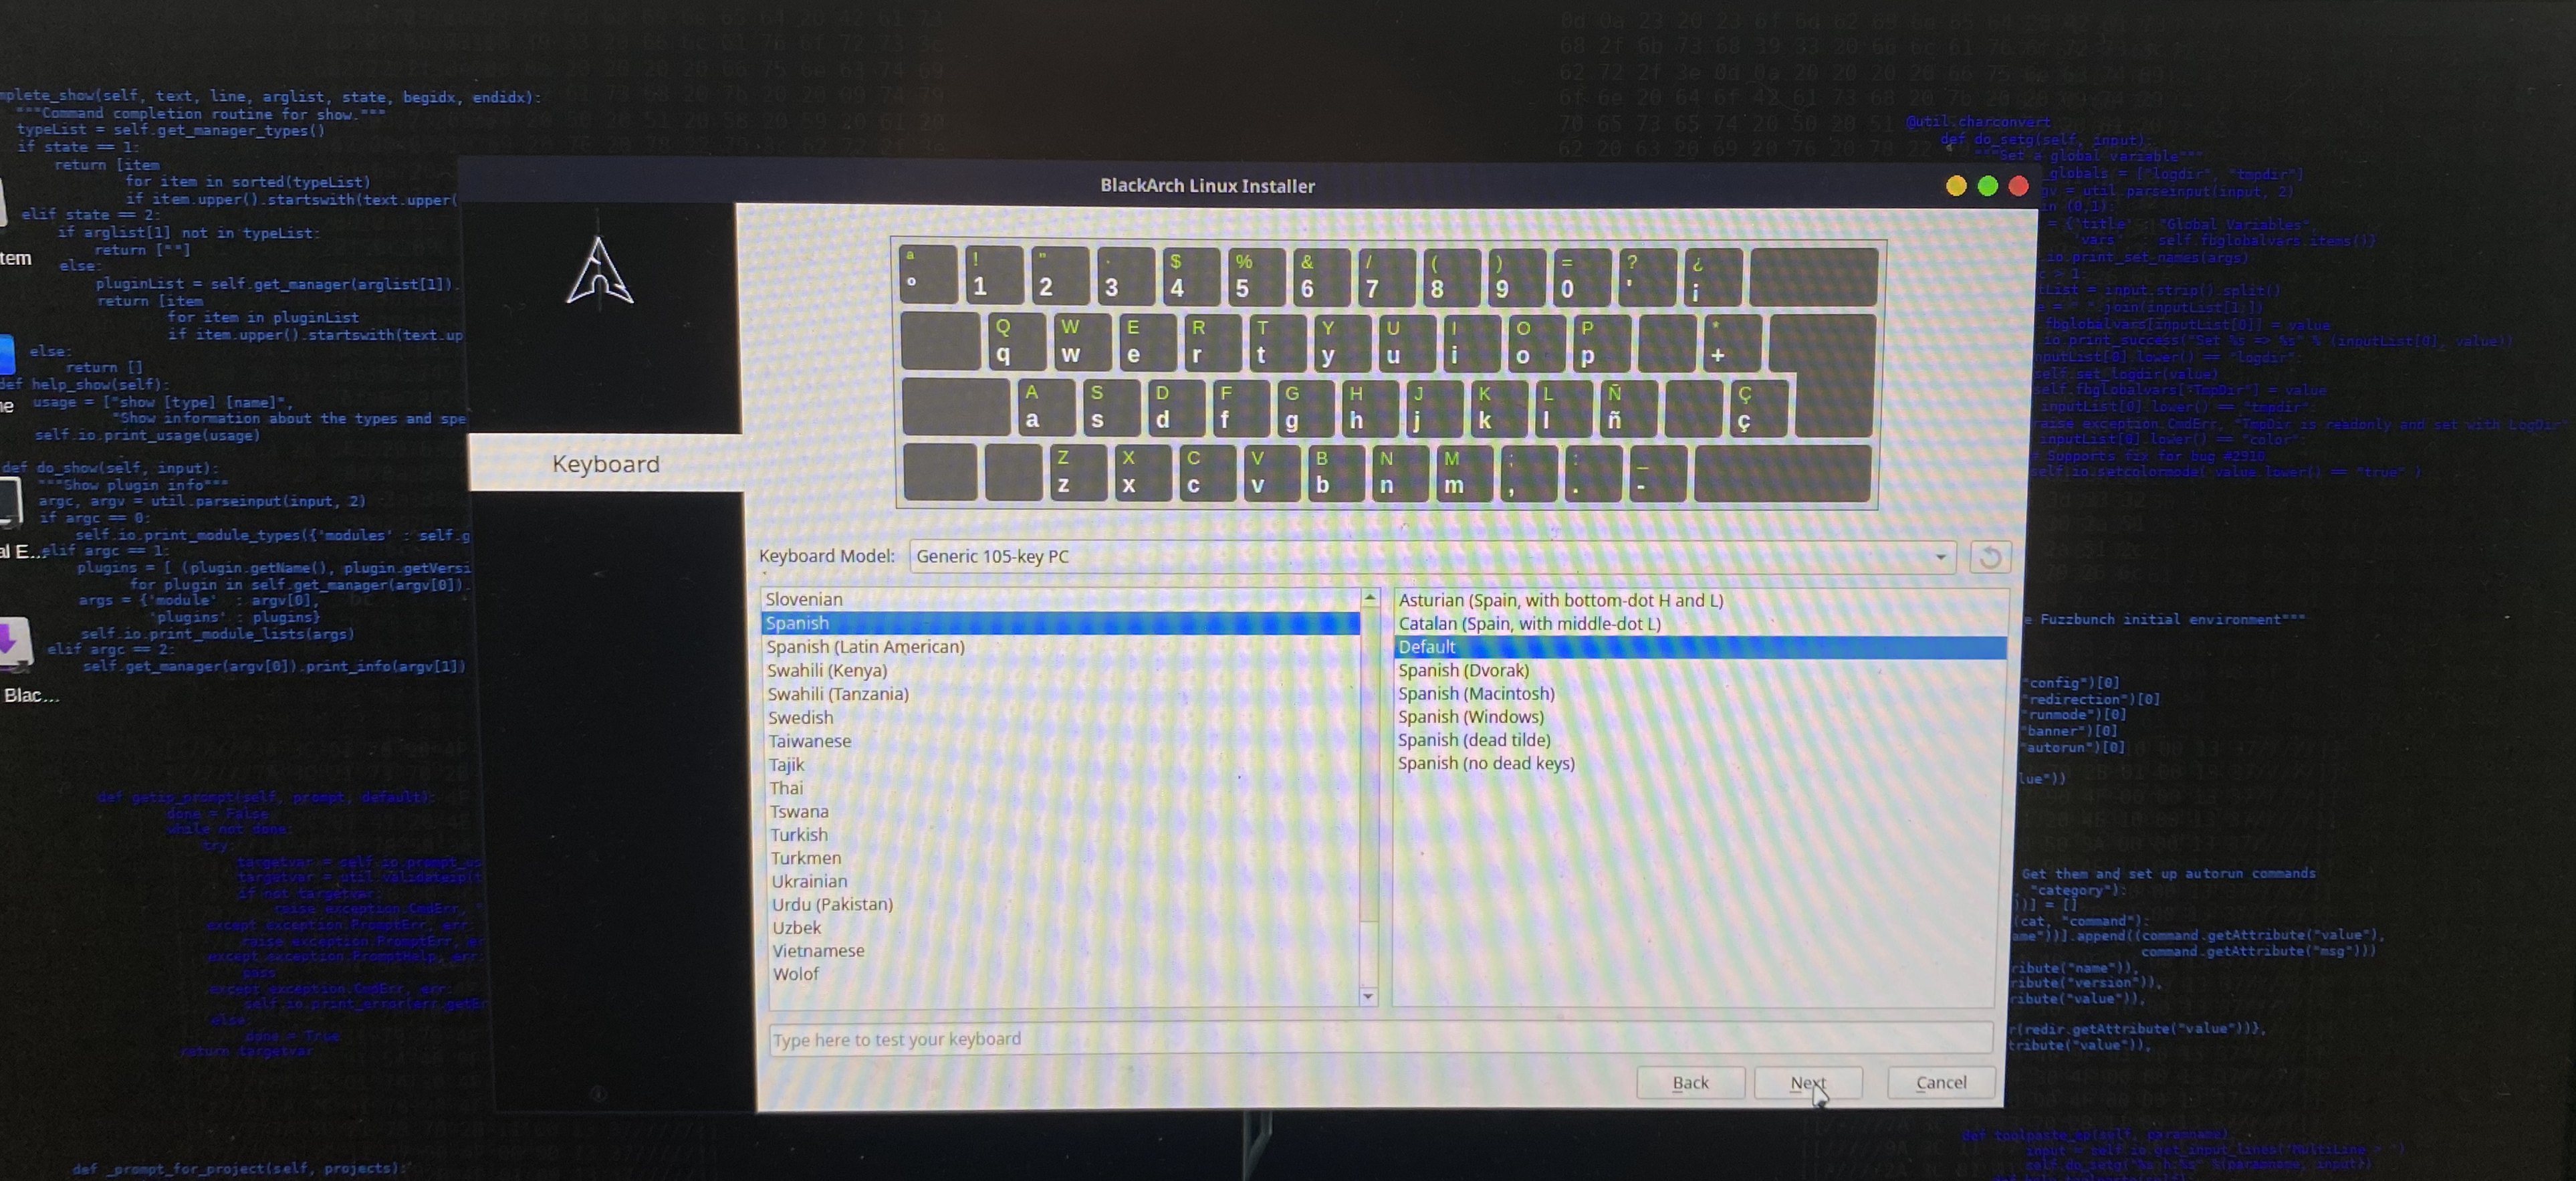
Finally, select your preferred keyboard layout:
[!Warning] Warning
Do not select this option. This option will automate the installation process, but it appears to be “deprecated,” and the installation will get stuck at 4%.

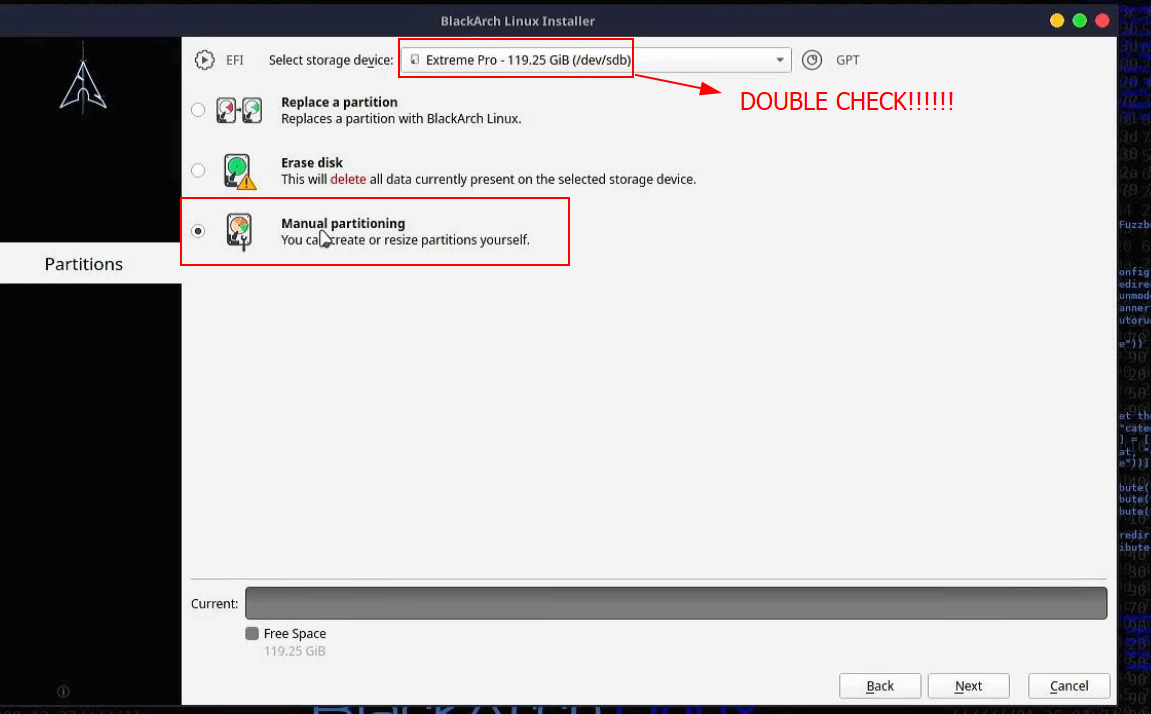
After completing the configuration, it’s time for installation. Here, select the USB where BlackArch will be installed. It’s essential to ensure that the selected disk is the USB, as selecting your laptop’s/PC’s disk will erase all its data.
Next, select “Manual partitioning.”
Create a new partition.
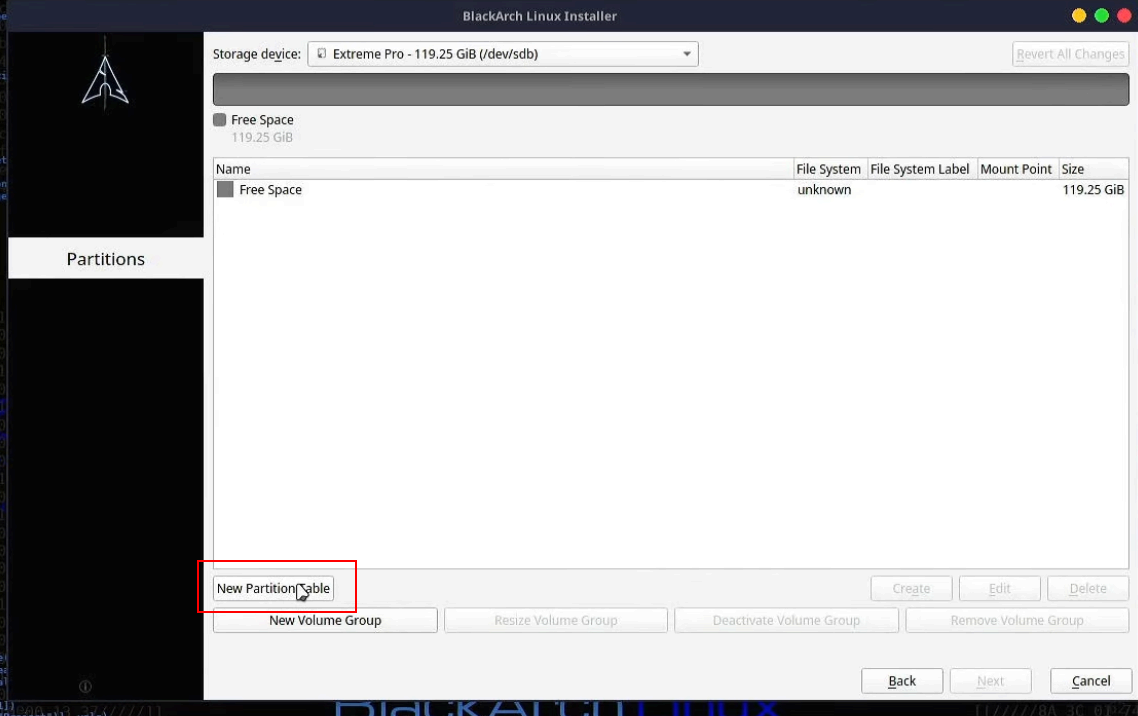
Choose “GUID Partition Table (GPT).”

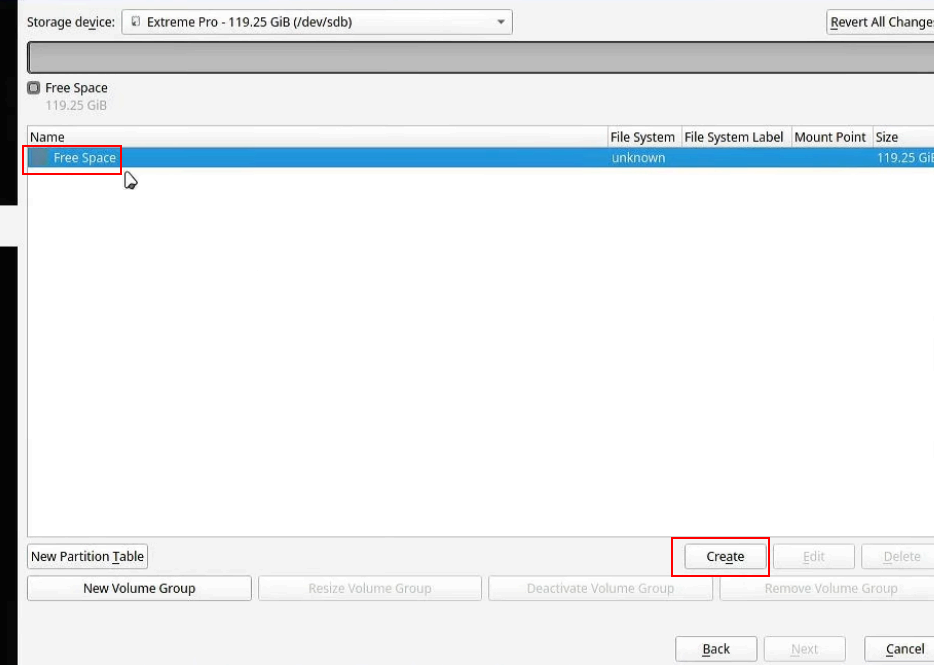
Then select “Free Space” and click “Create.”
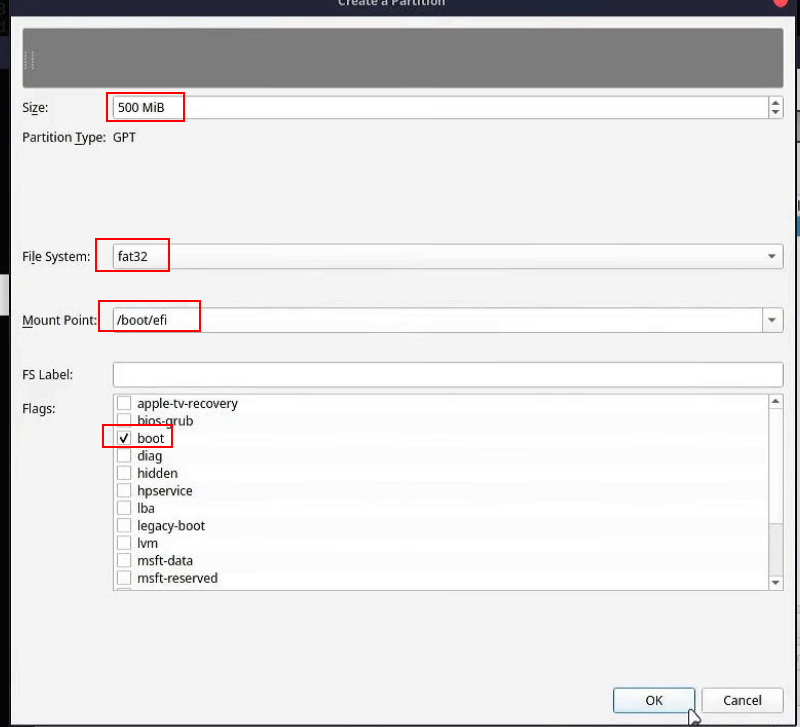
The first partition is for “boot,” so it should be configured as follows:
- Size -> 500MB
- File System -> fat32
- Mount Point -> /boot/efi
- Flags -> boot
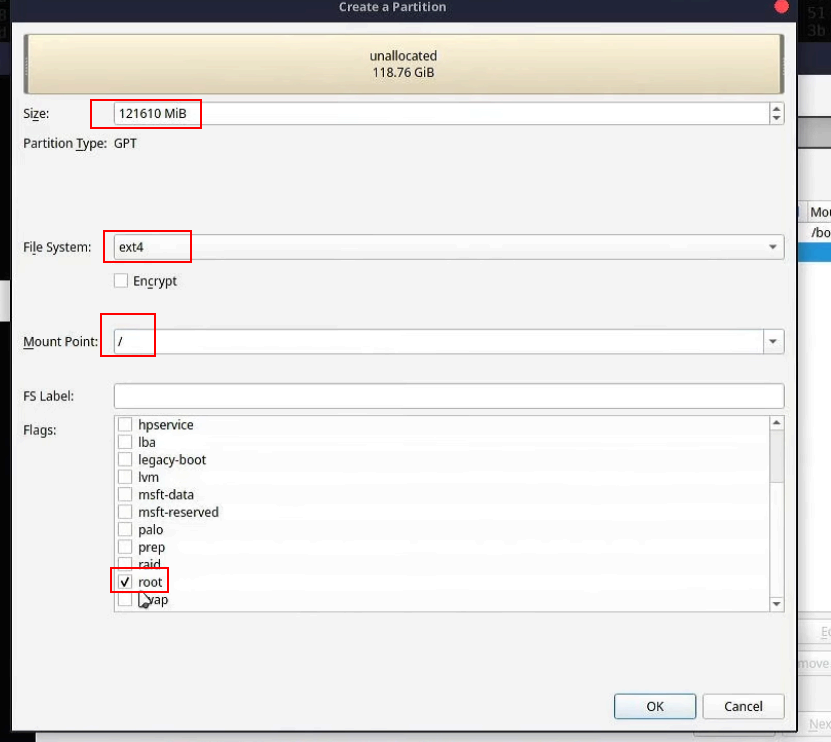
Then, select the remaining space and click “Create.”
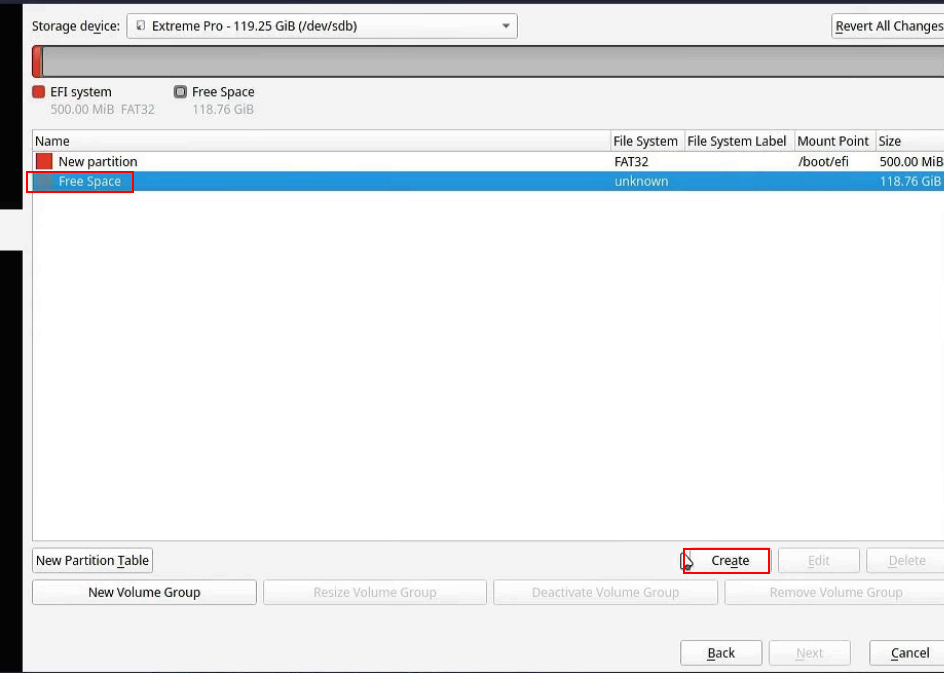
This remaining space will be used to install BlackArch. Configure it as follows:
- Size -> The rest
- File System -> ext4
- Mount Point -> /
- Flags -> root
When the partitions are created, click “Next,” and the screen will show a summary of the partitions.
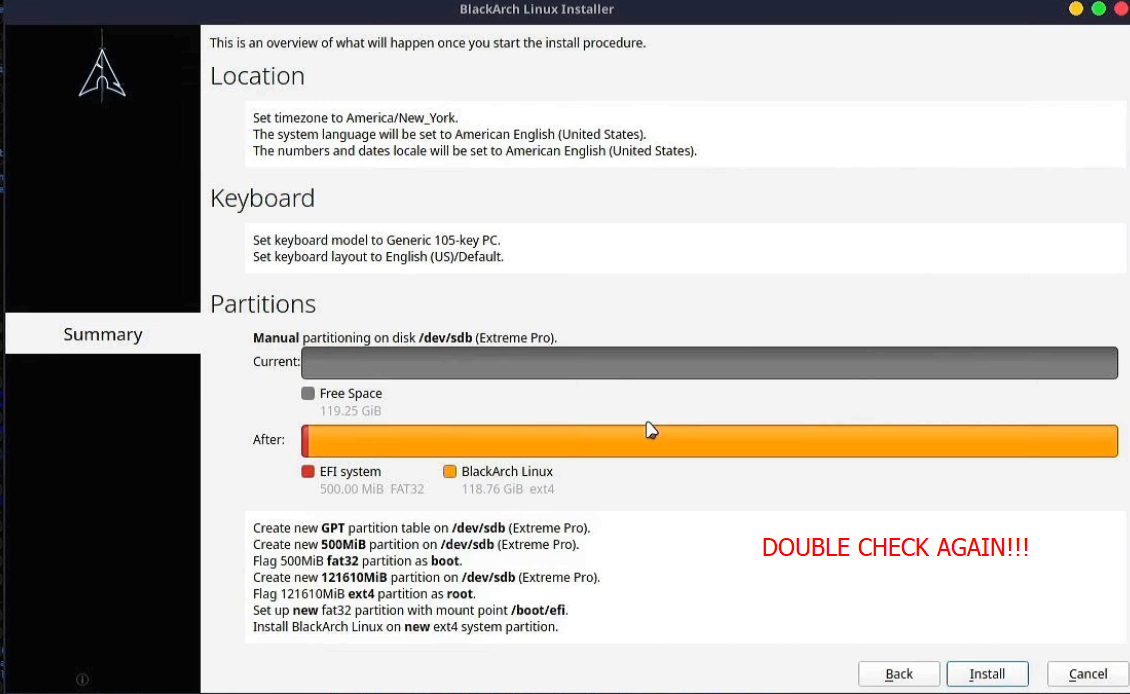
Ensure everything is correct, then click “Install.”
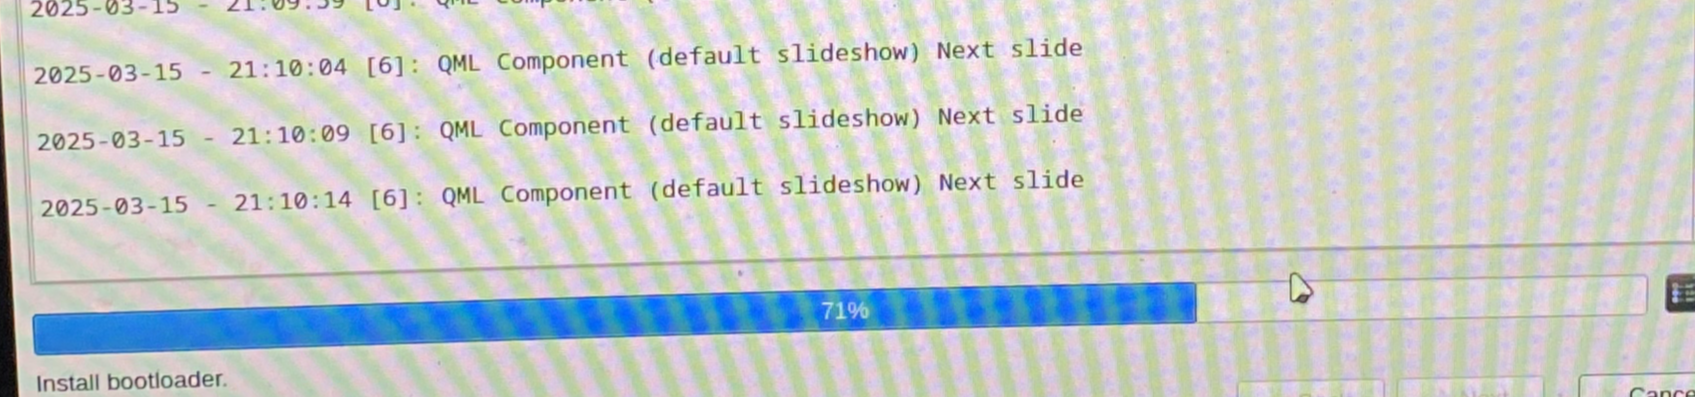
Now, simply wait. The installation typically takes 2 hours. There might be moments where it seems stuck, particularly at 71% when installing the bootloader.
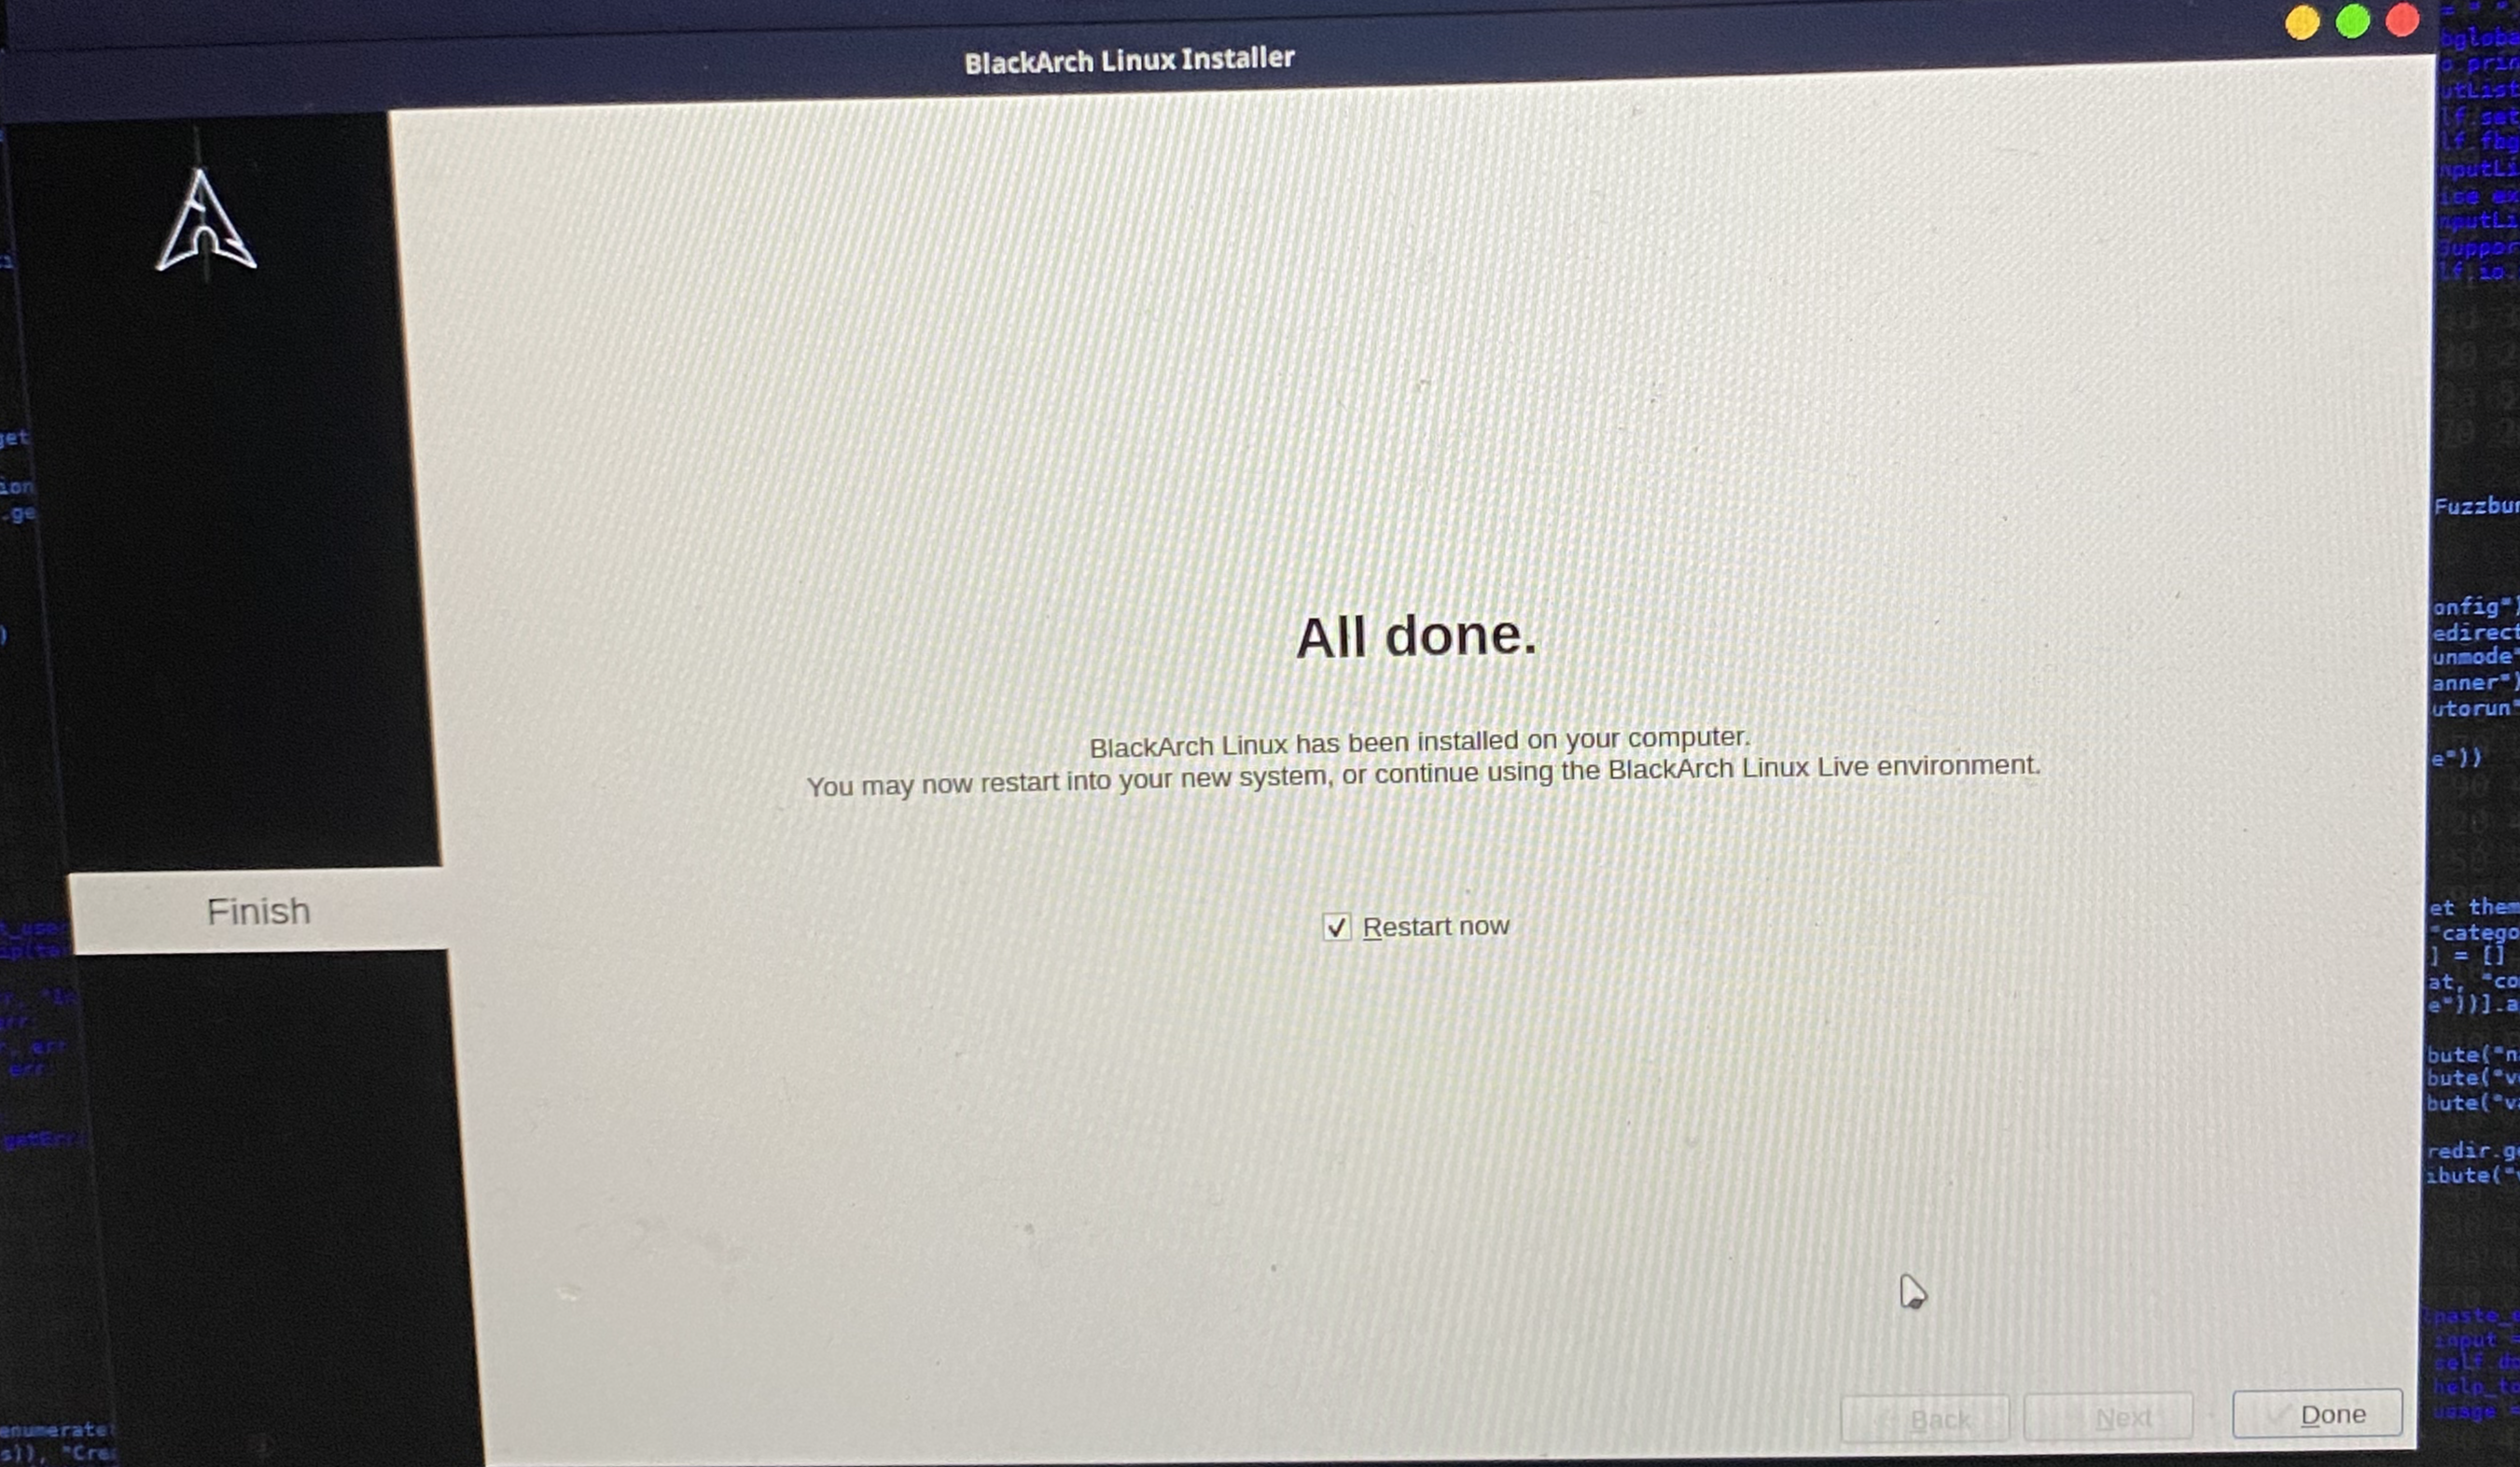
Once installed, check “Restart now” and click “Done.” While restarting, repeat the previous steps and press the appropriate key to access the BIOS.
.png)
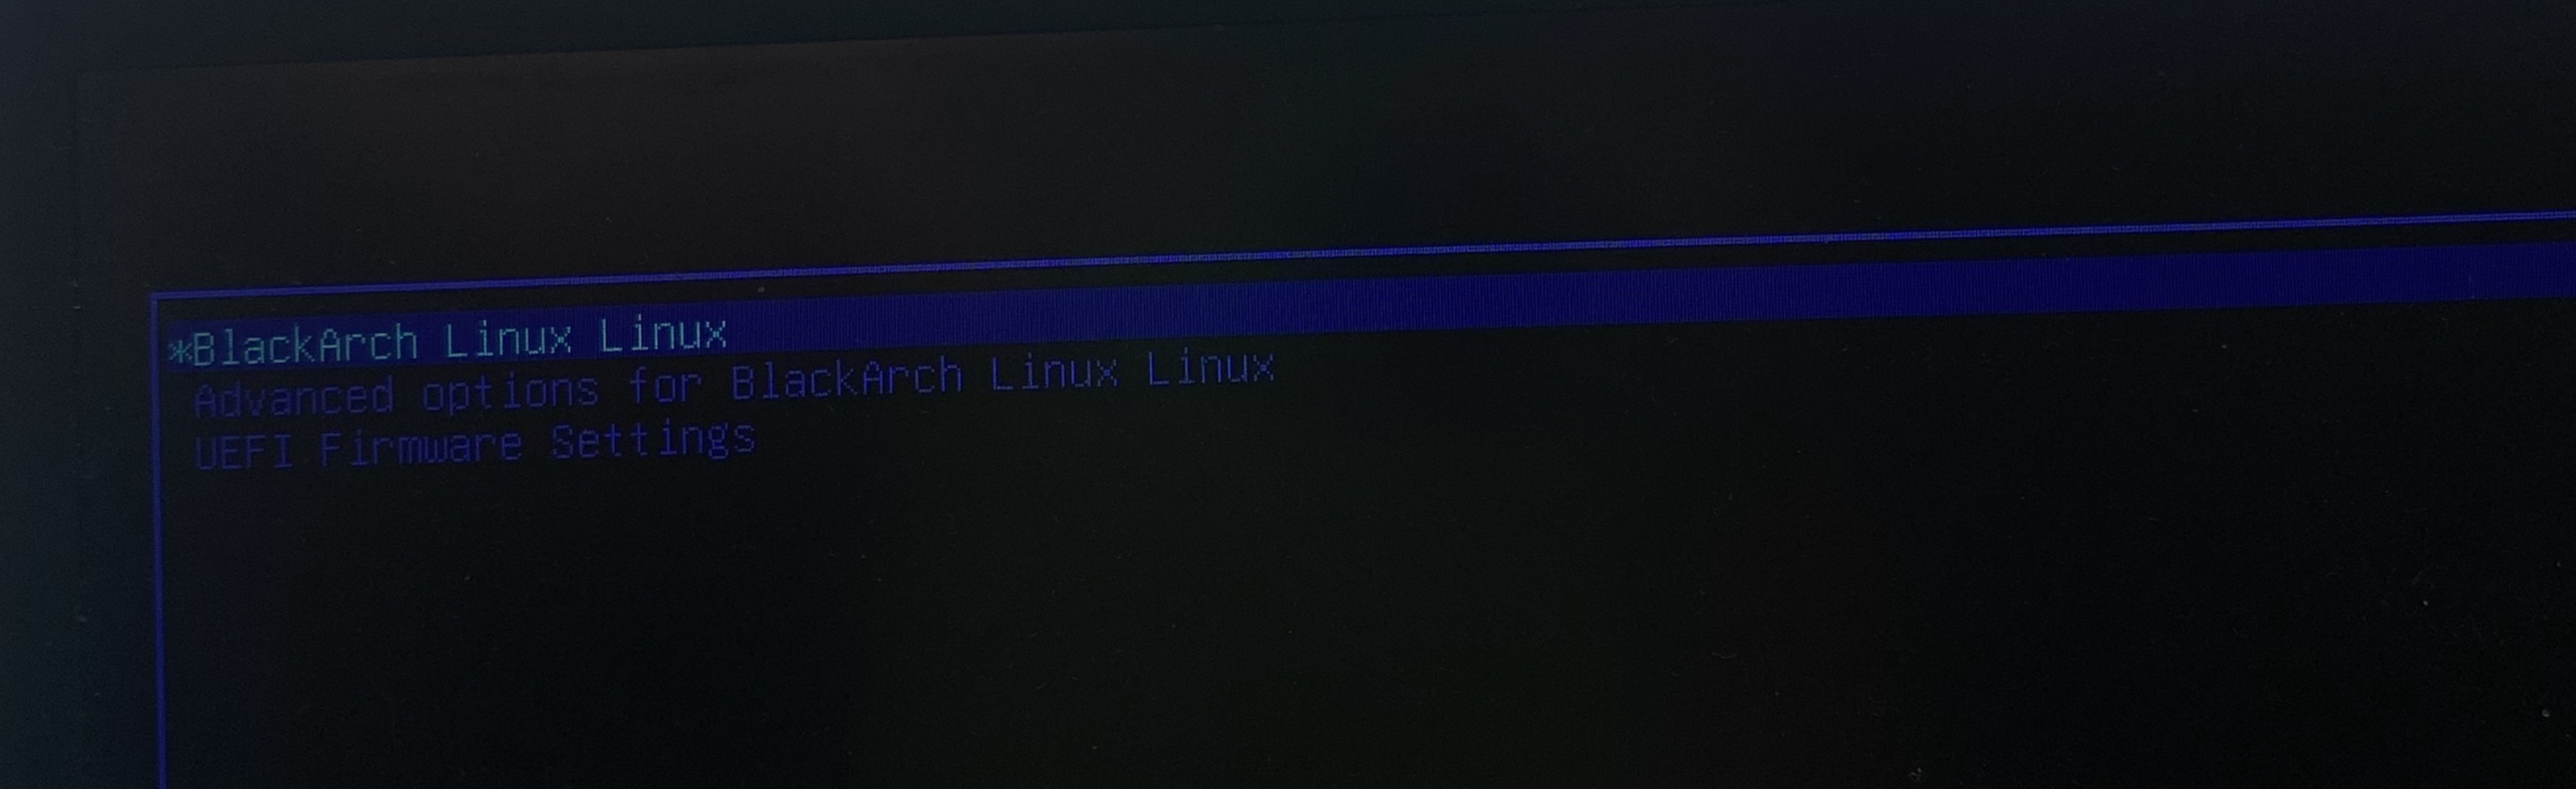
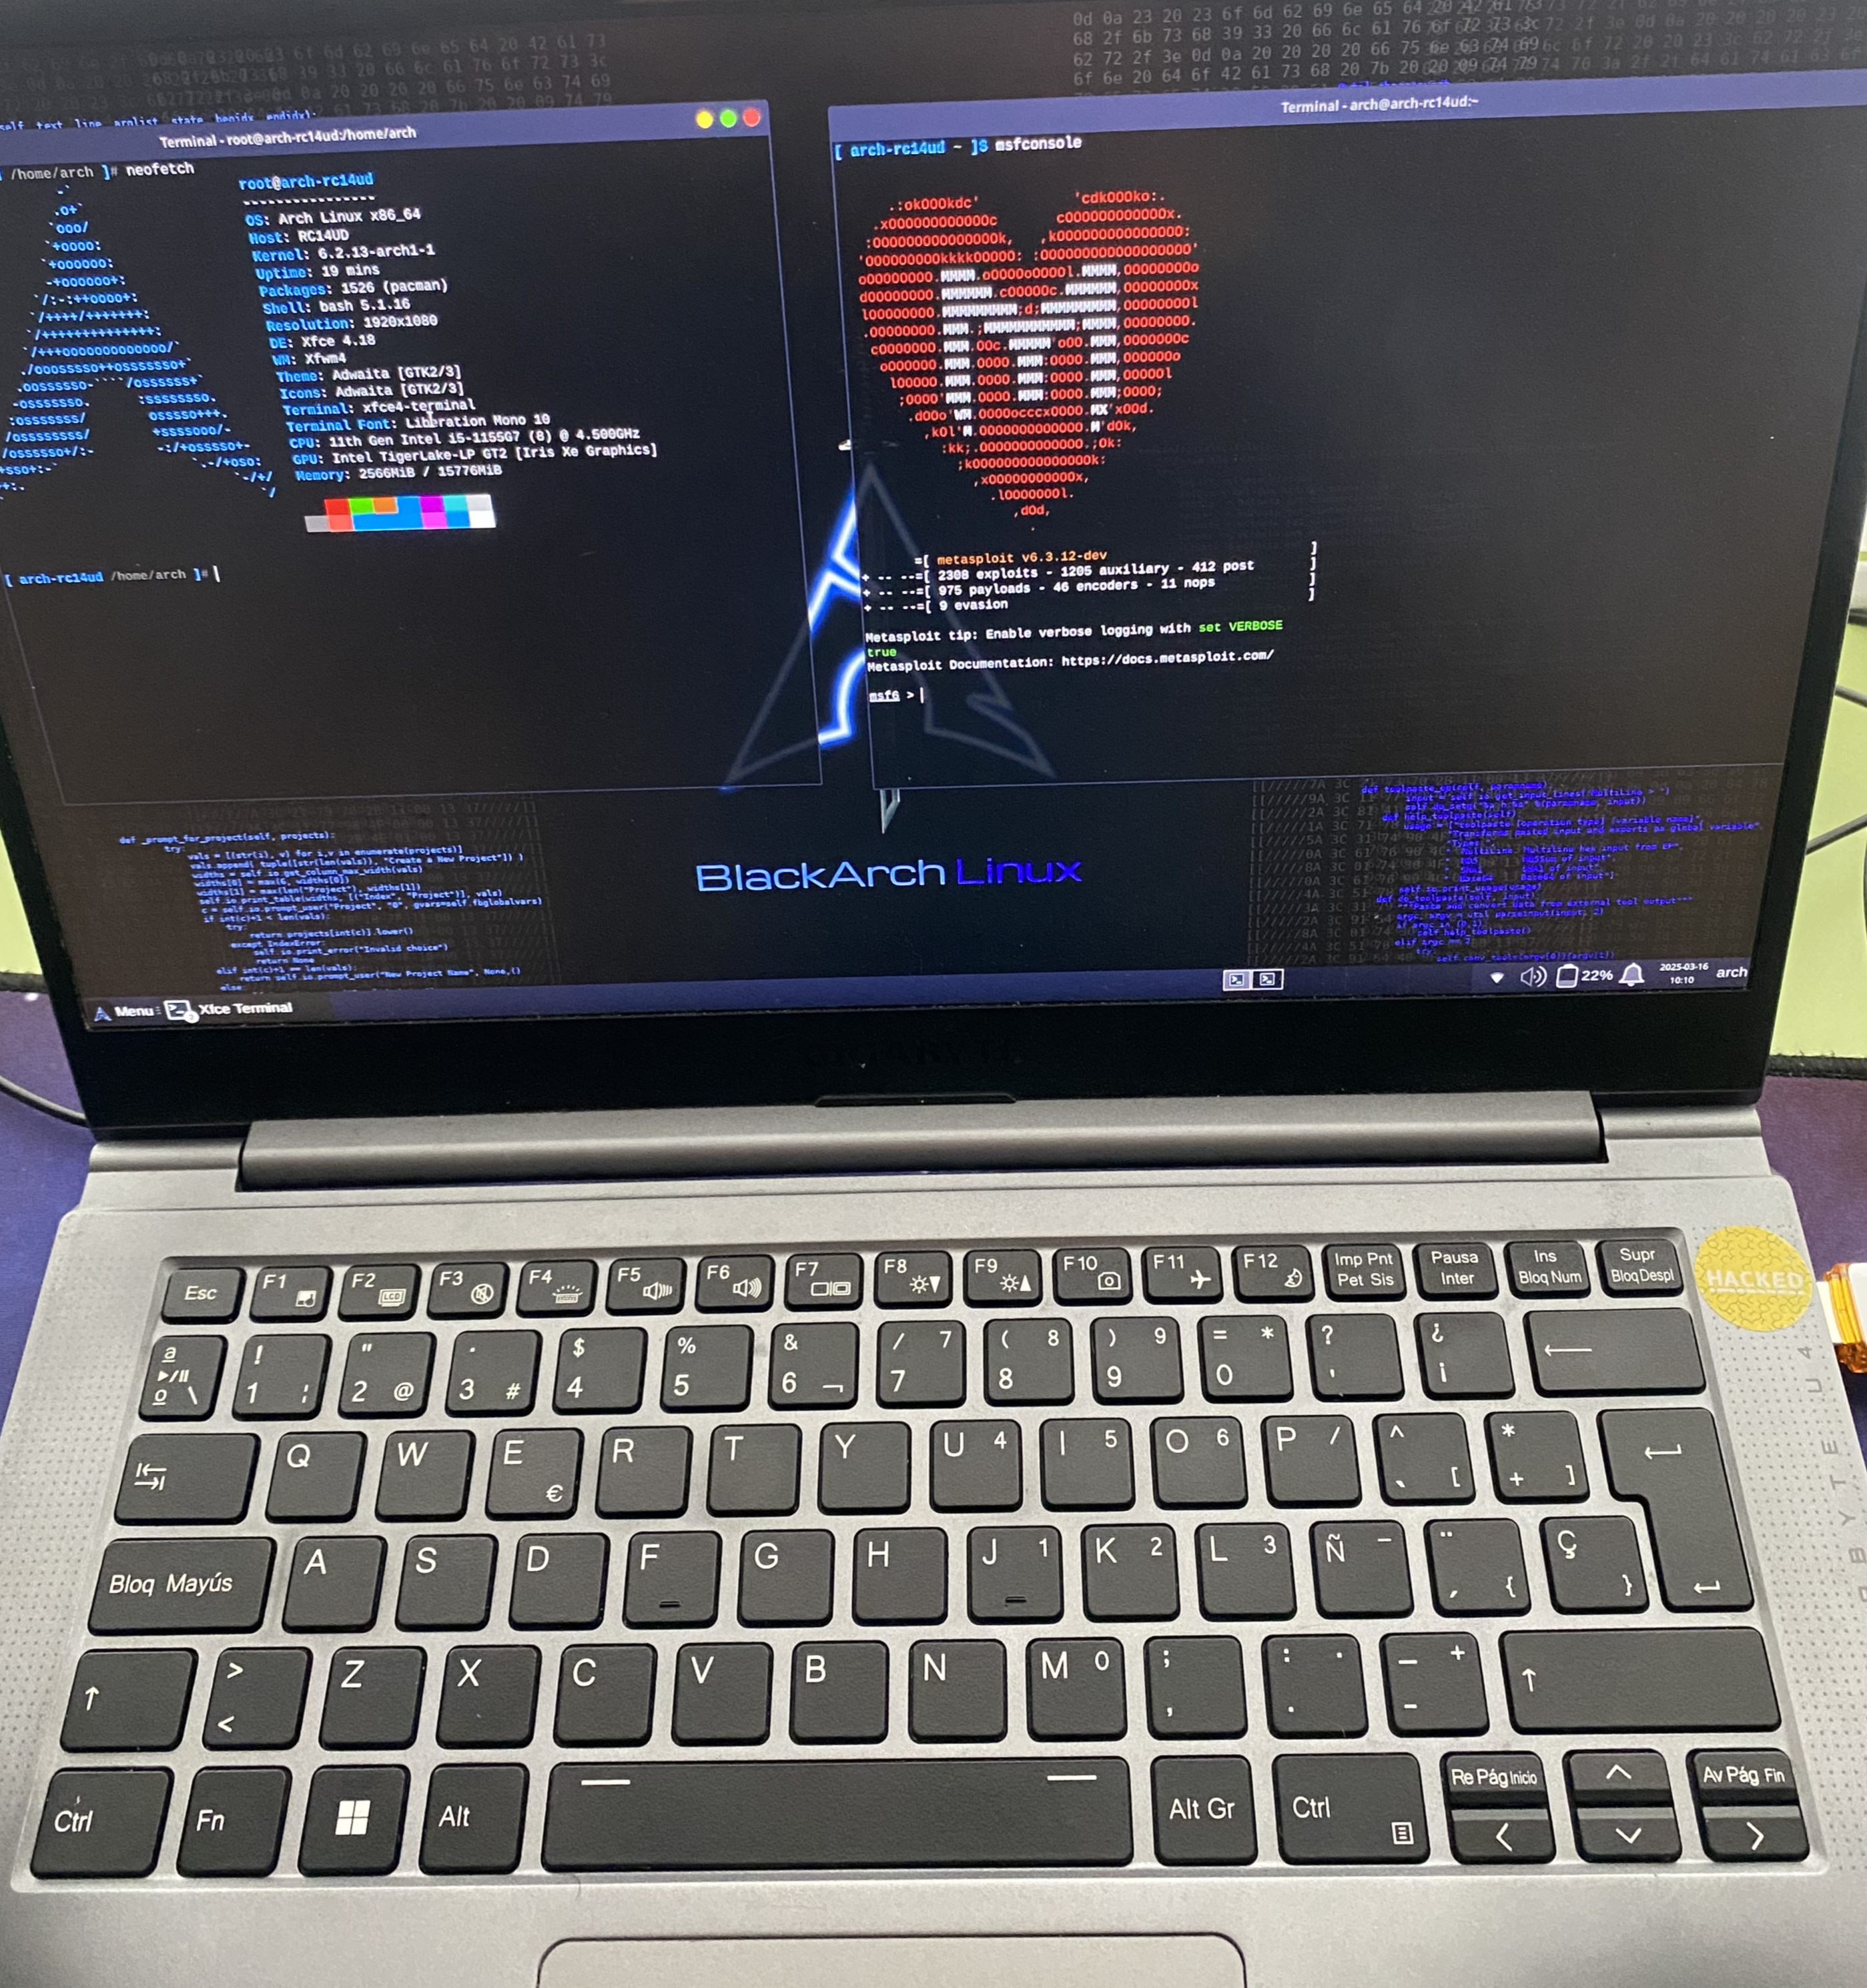
When it boots, select BlackArch in the GRUB menu and log in with the credentials you set earlier.
Now, if you try to use pacman to update the repositories or install software, you’ll encounter the following error:
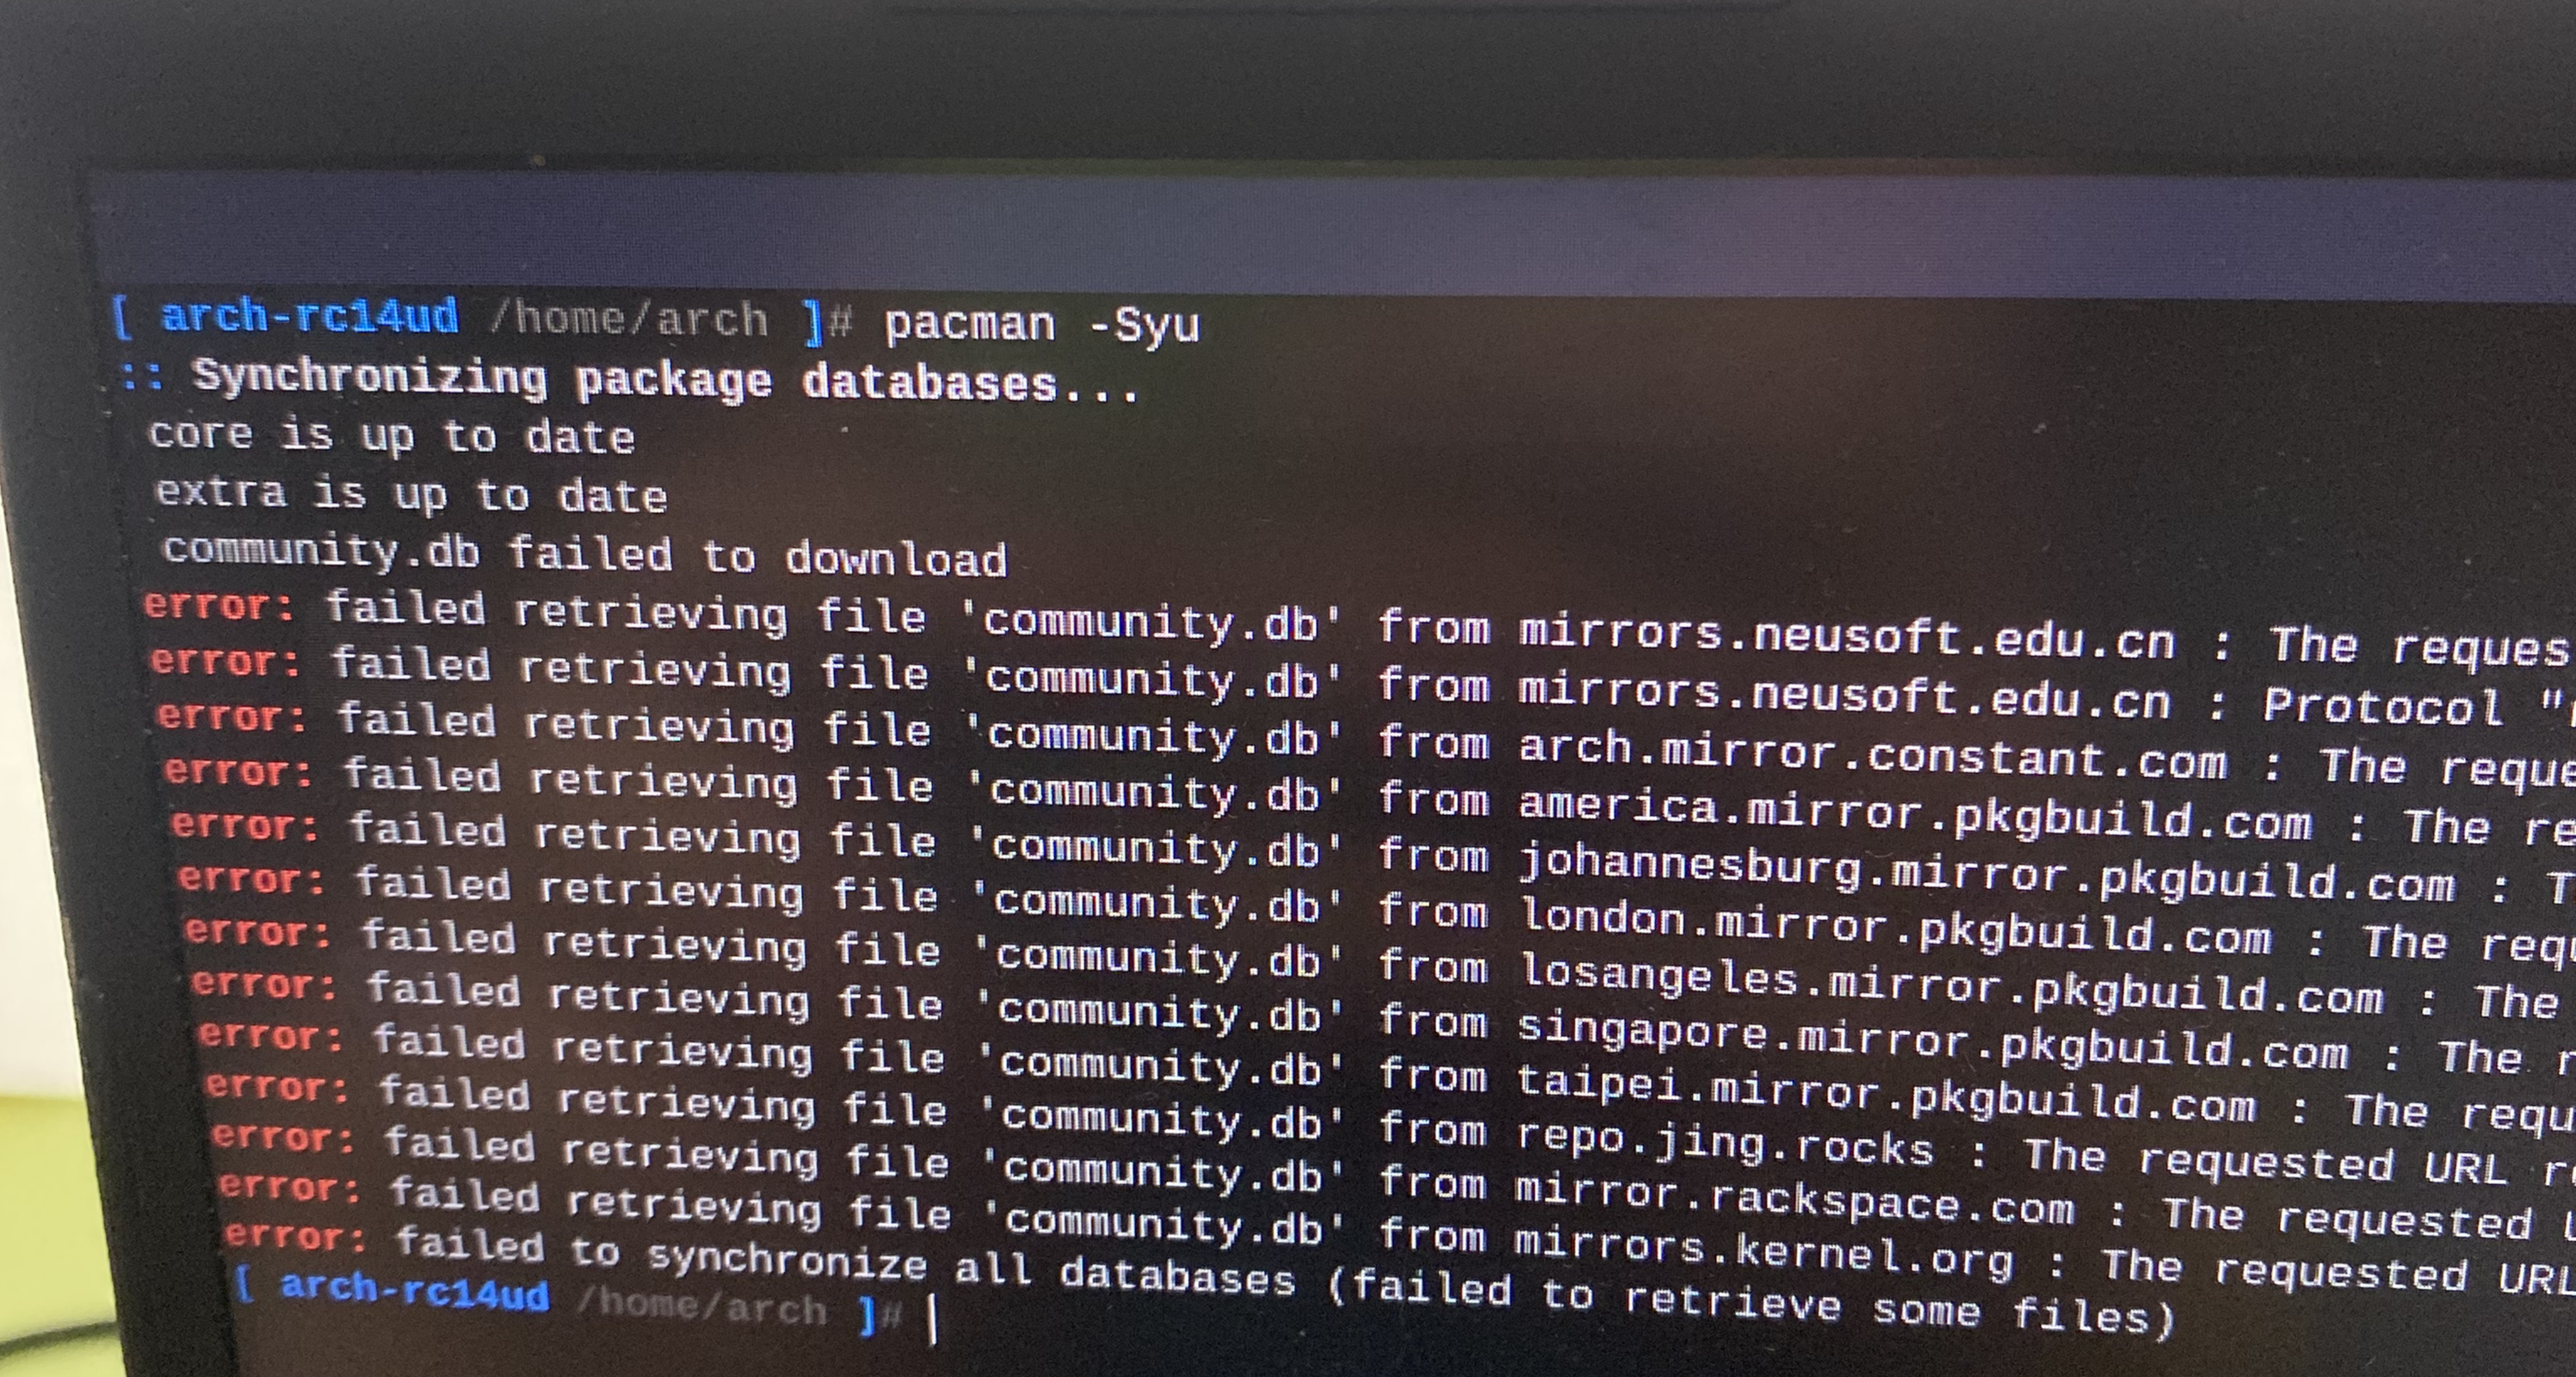
This is because, on March 1, 2025, there was a migration in Arch’s git repositories. You need to make the following changes for it to work. More info here: Arch Linux News.
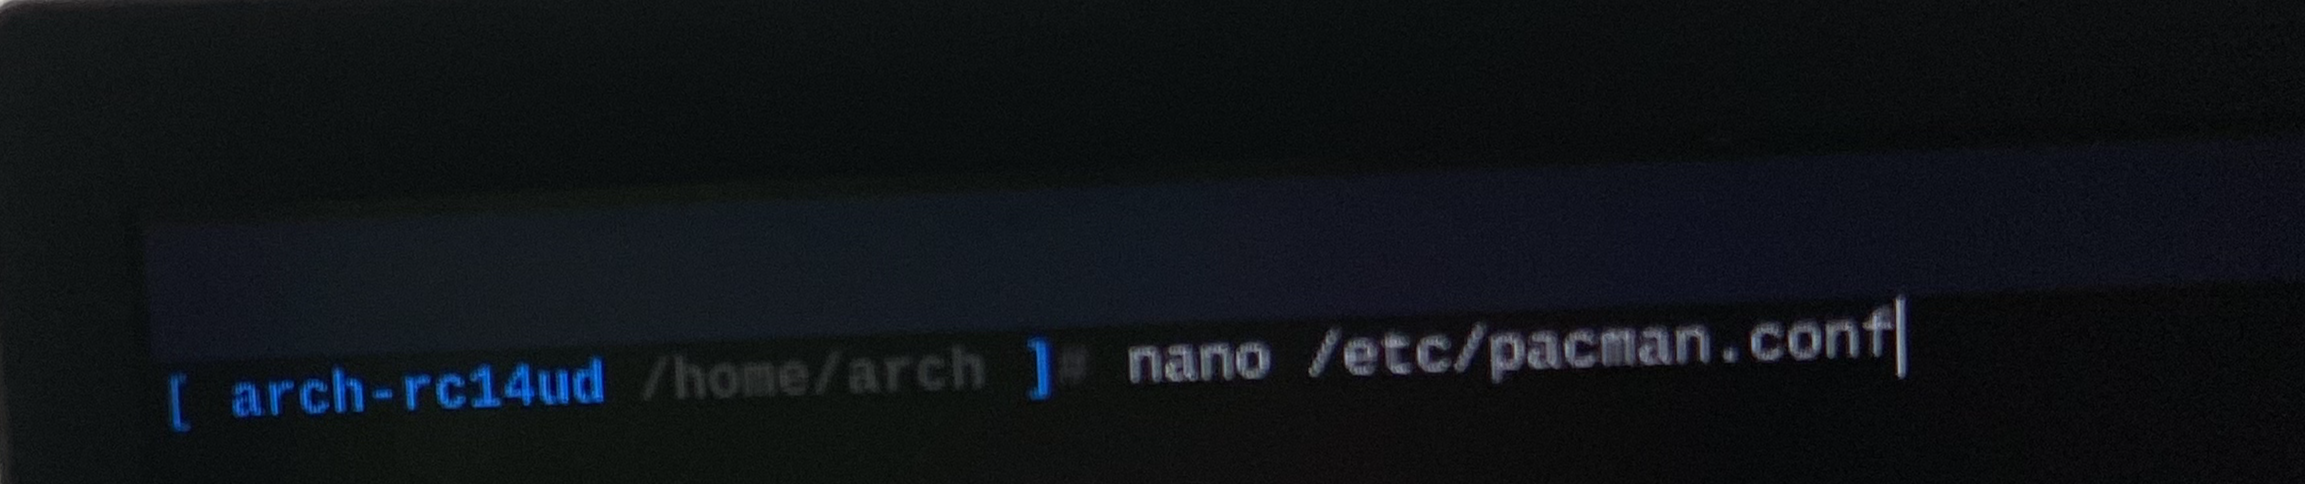
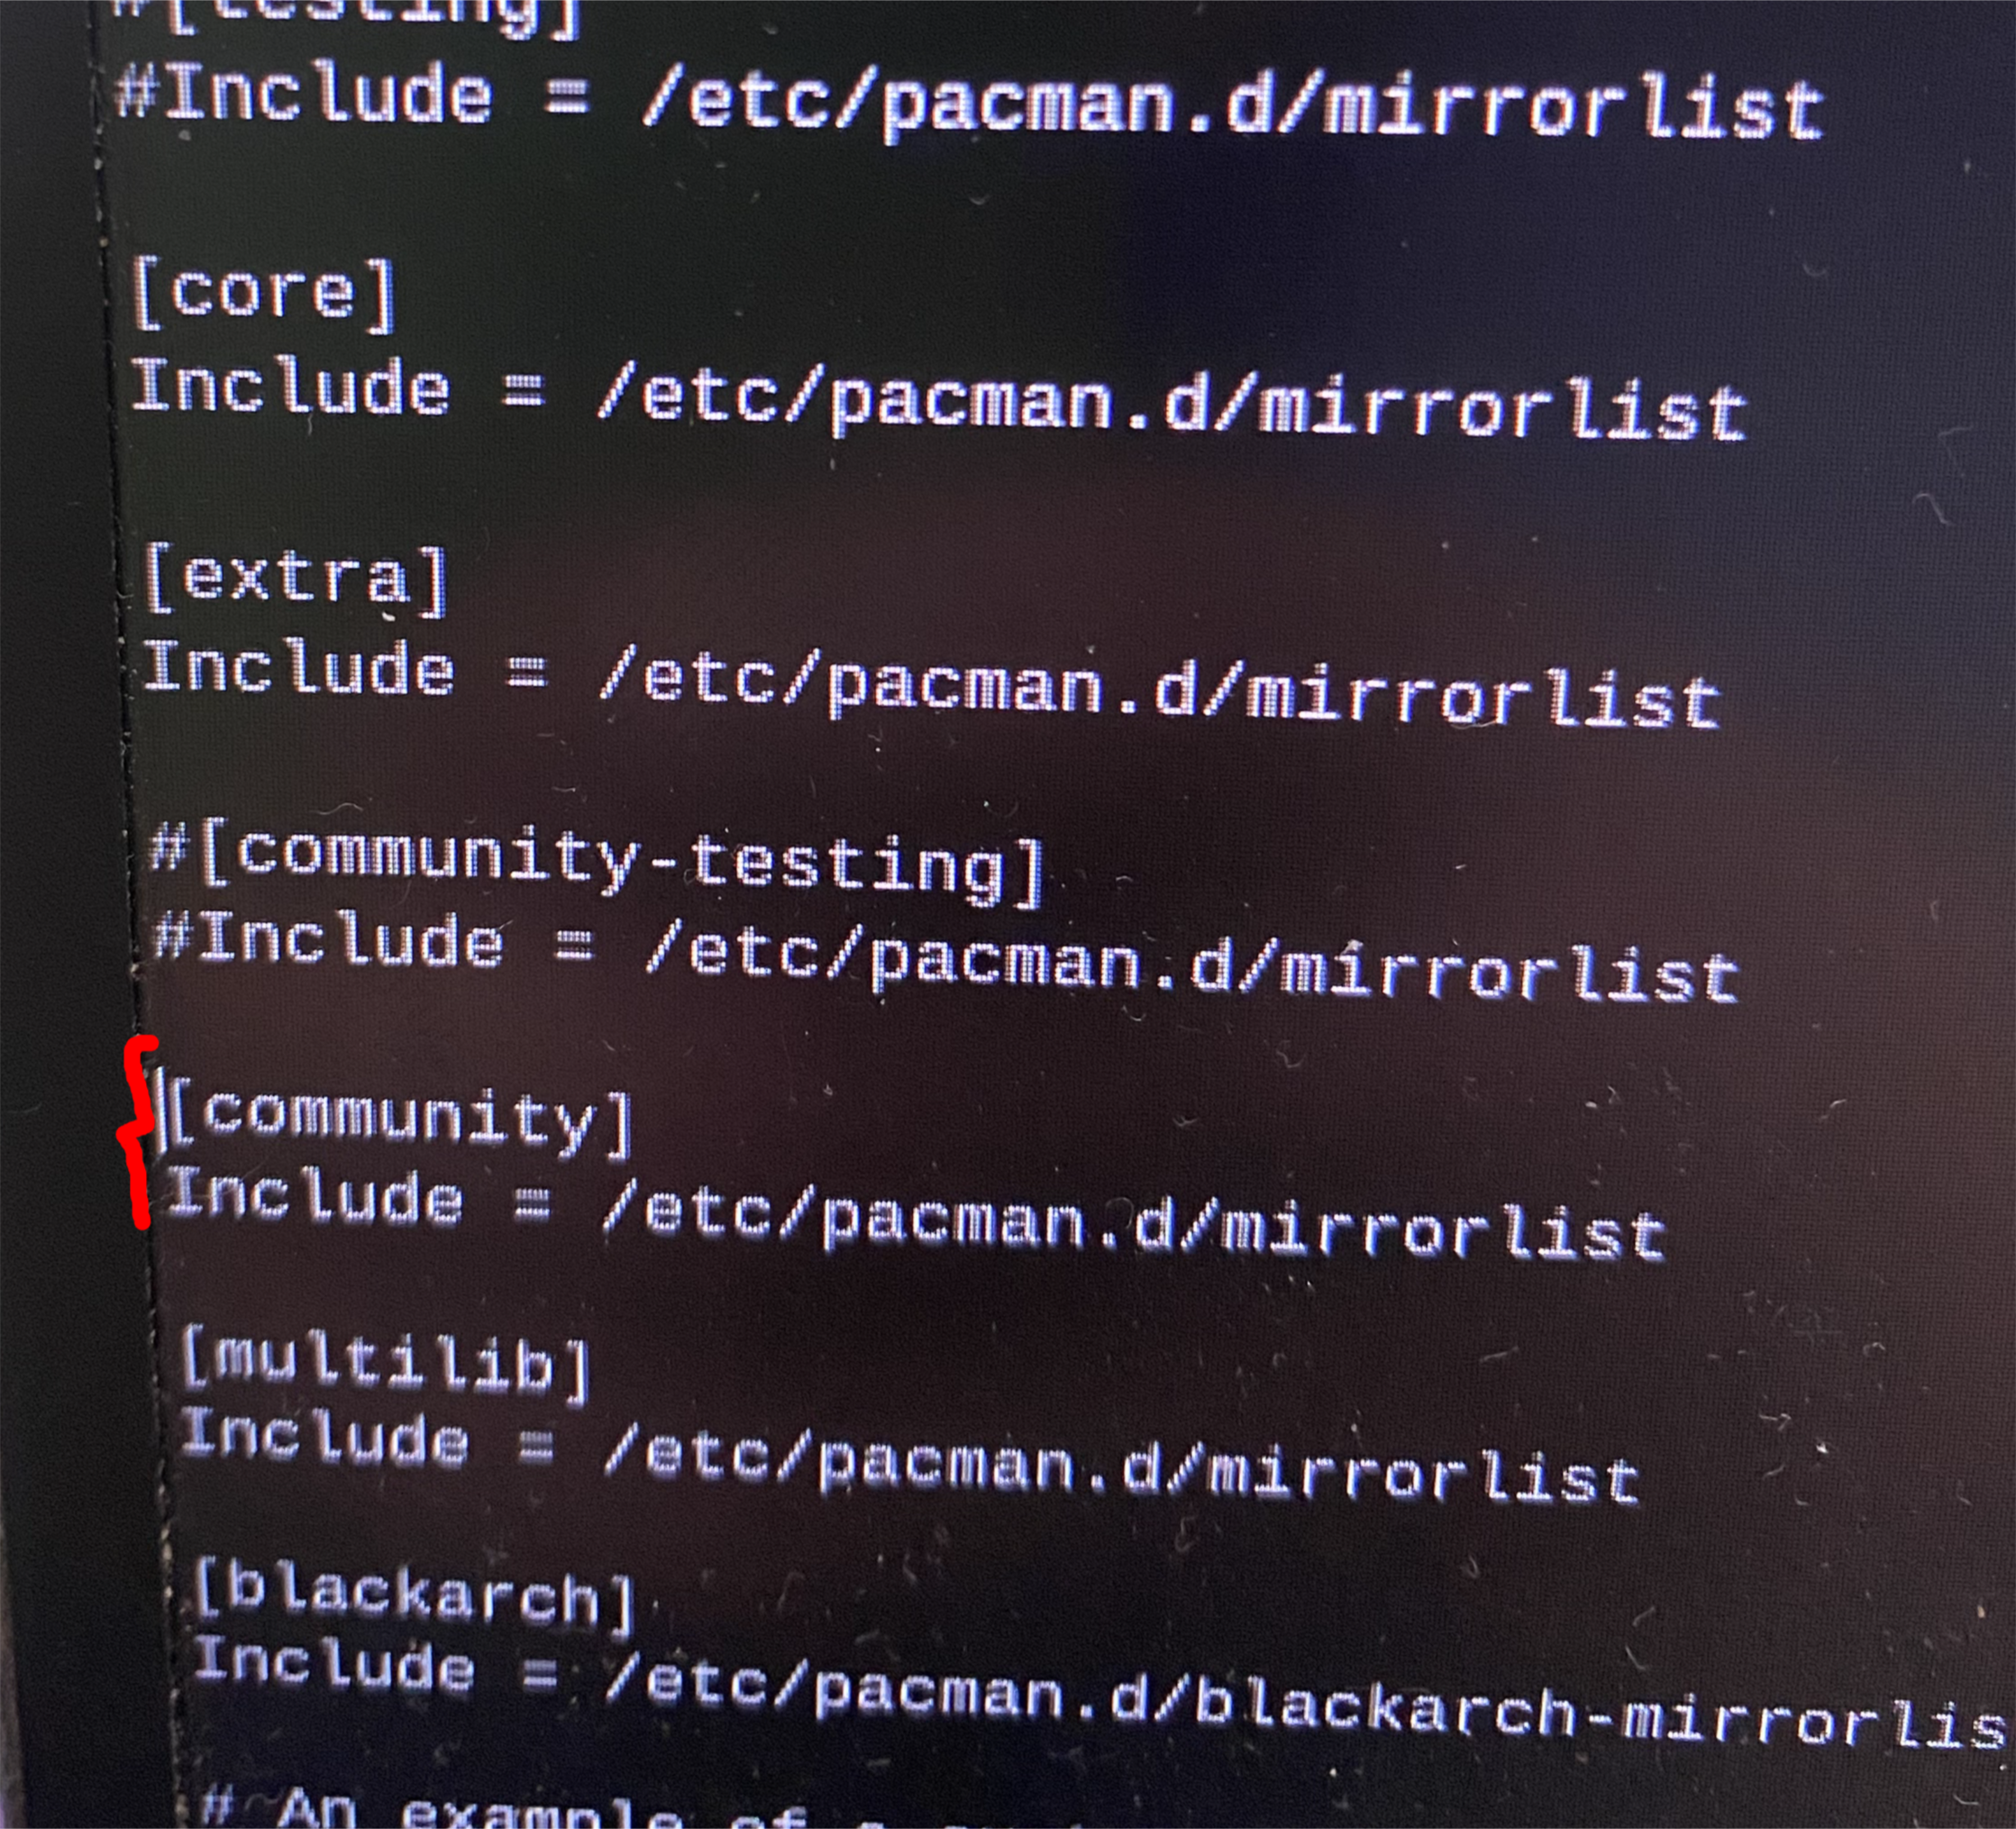
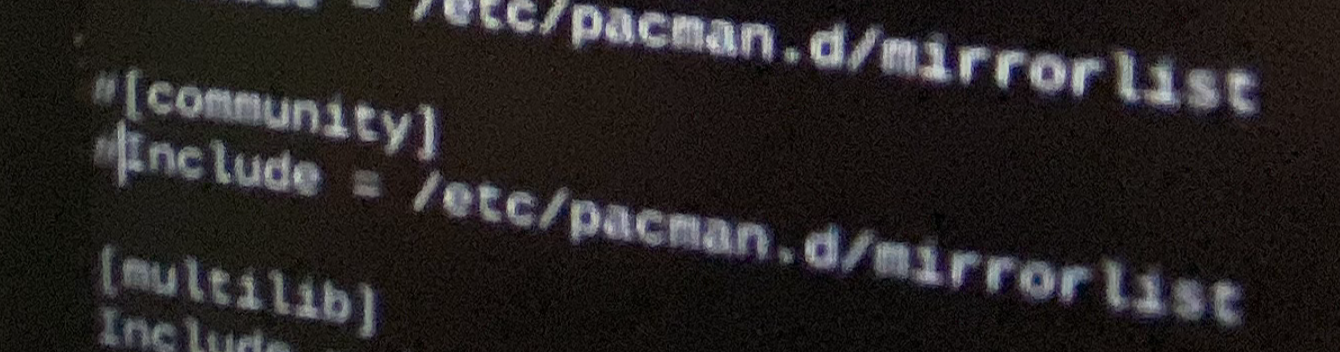
In /etc/pacman.conf, comment out “[community]” and the line that follows it: “Include = /etc/pacman.d/mirrorlist”.
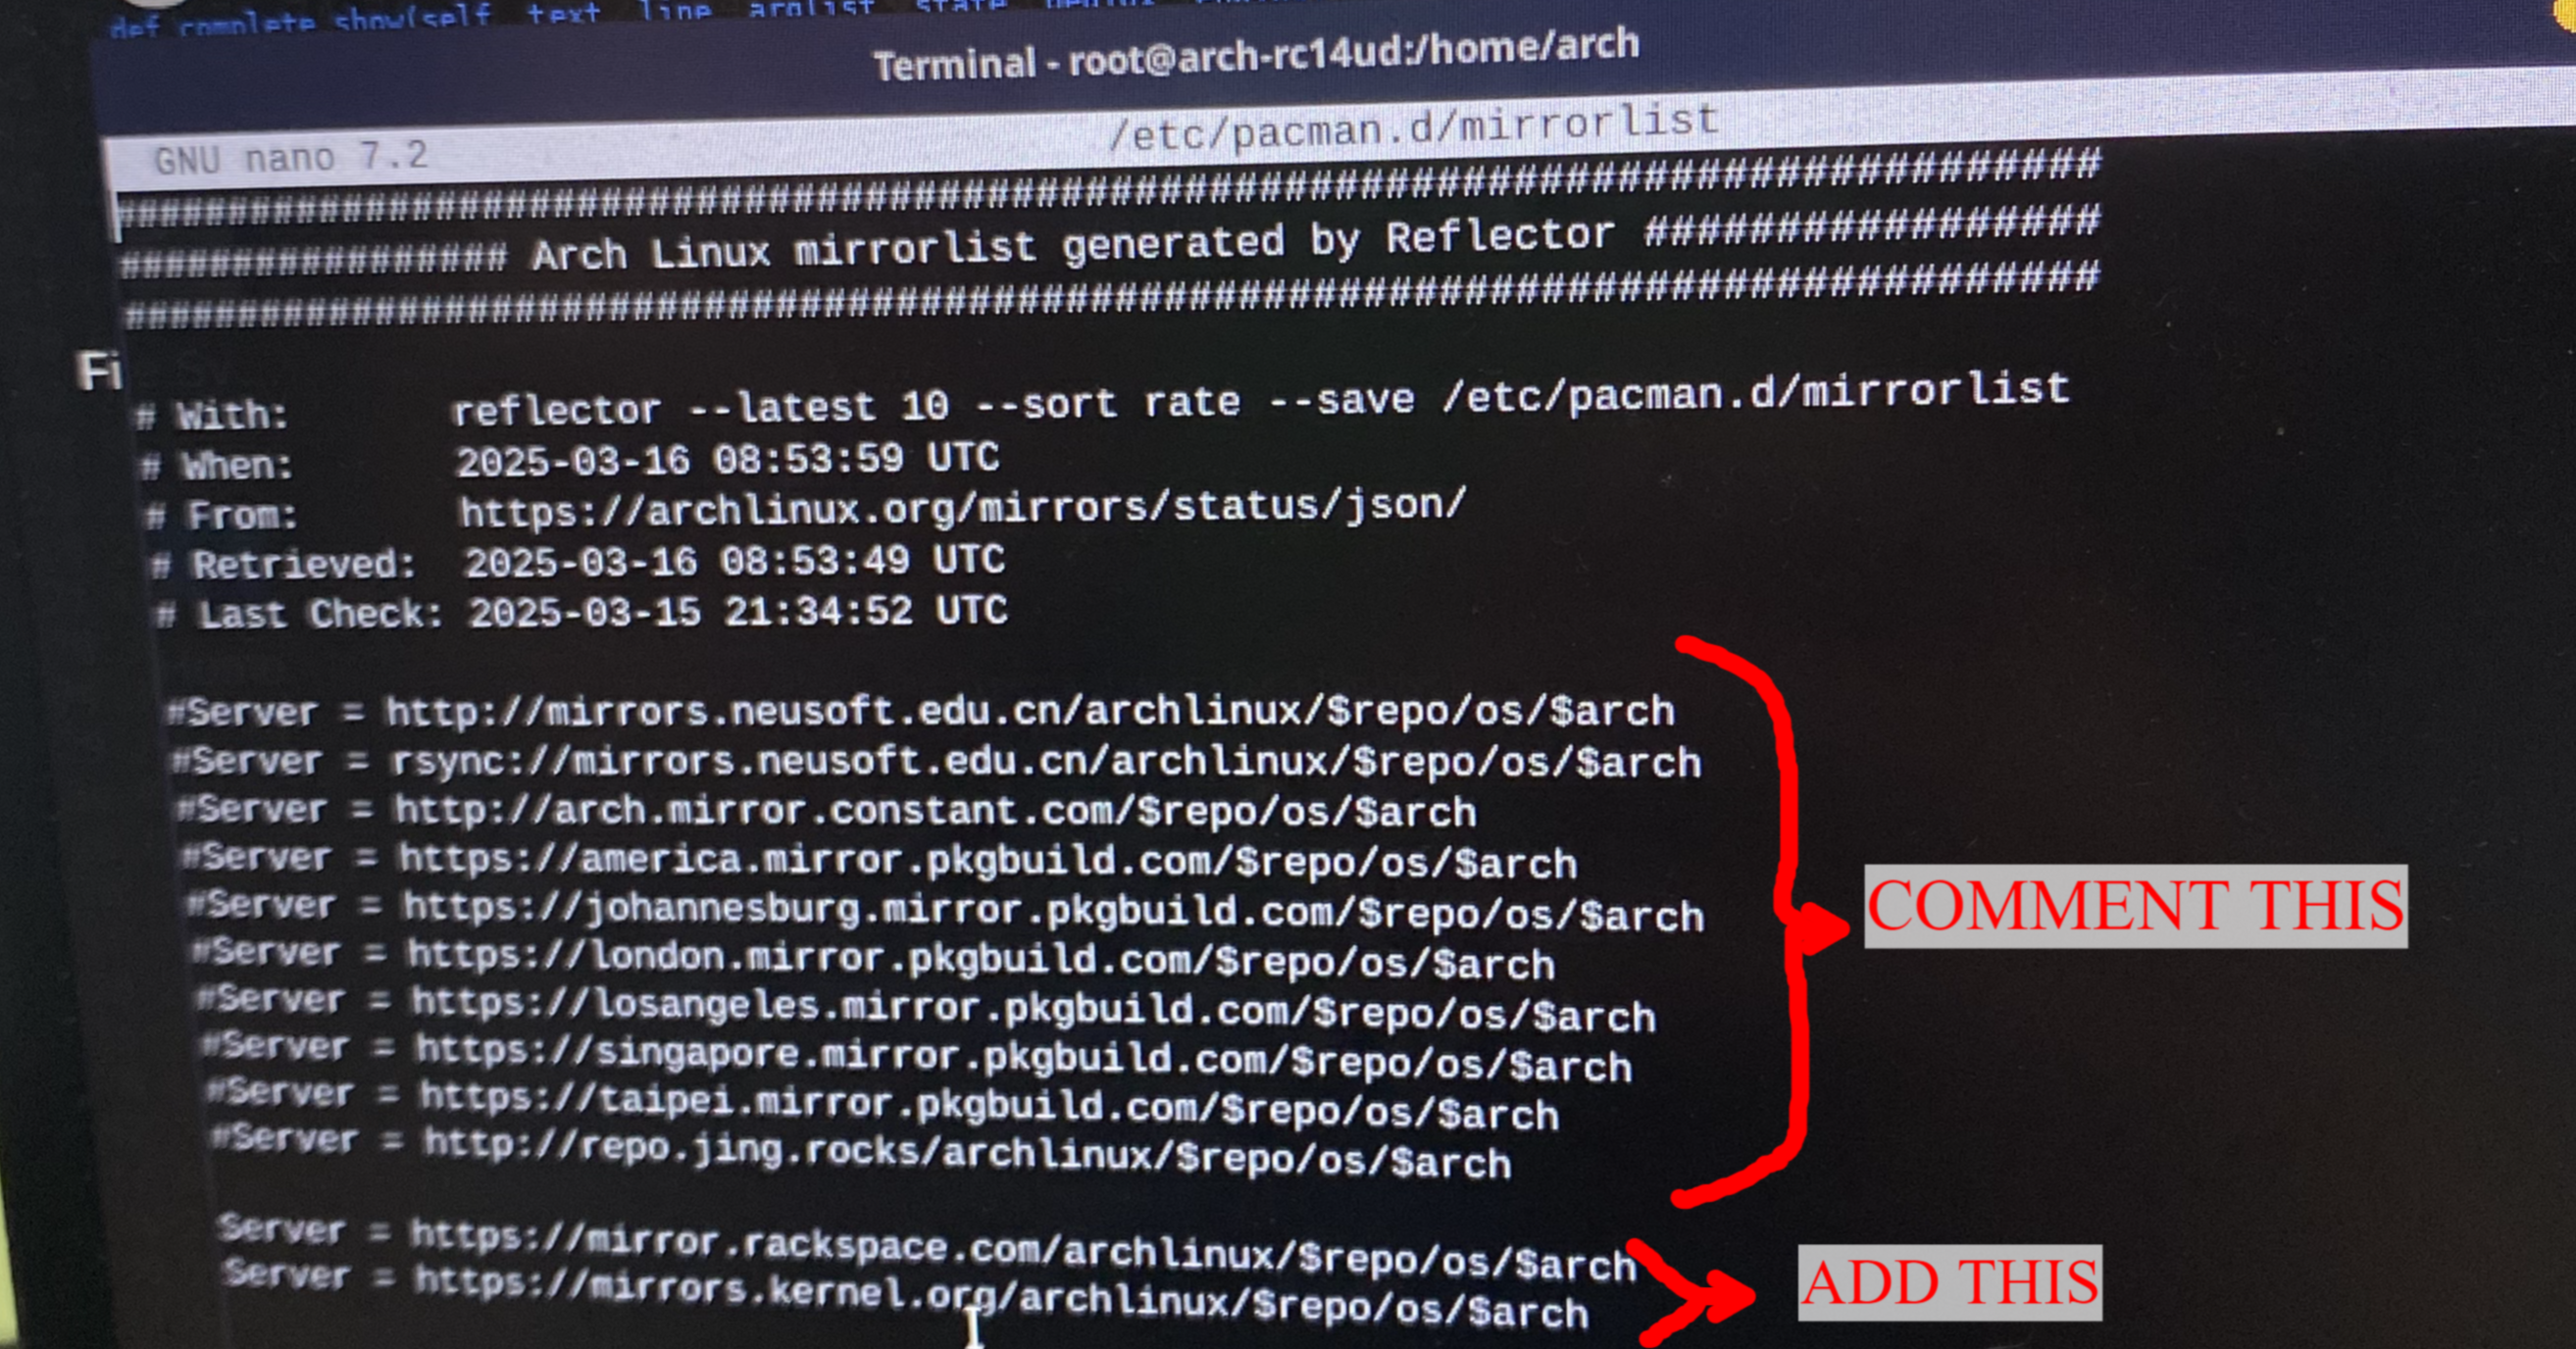
If you still encounter issues, edit /etc/pacman.d/mirrorlist as follows:
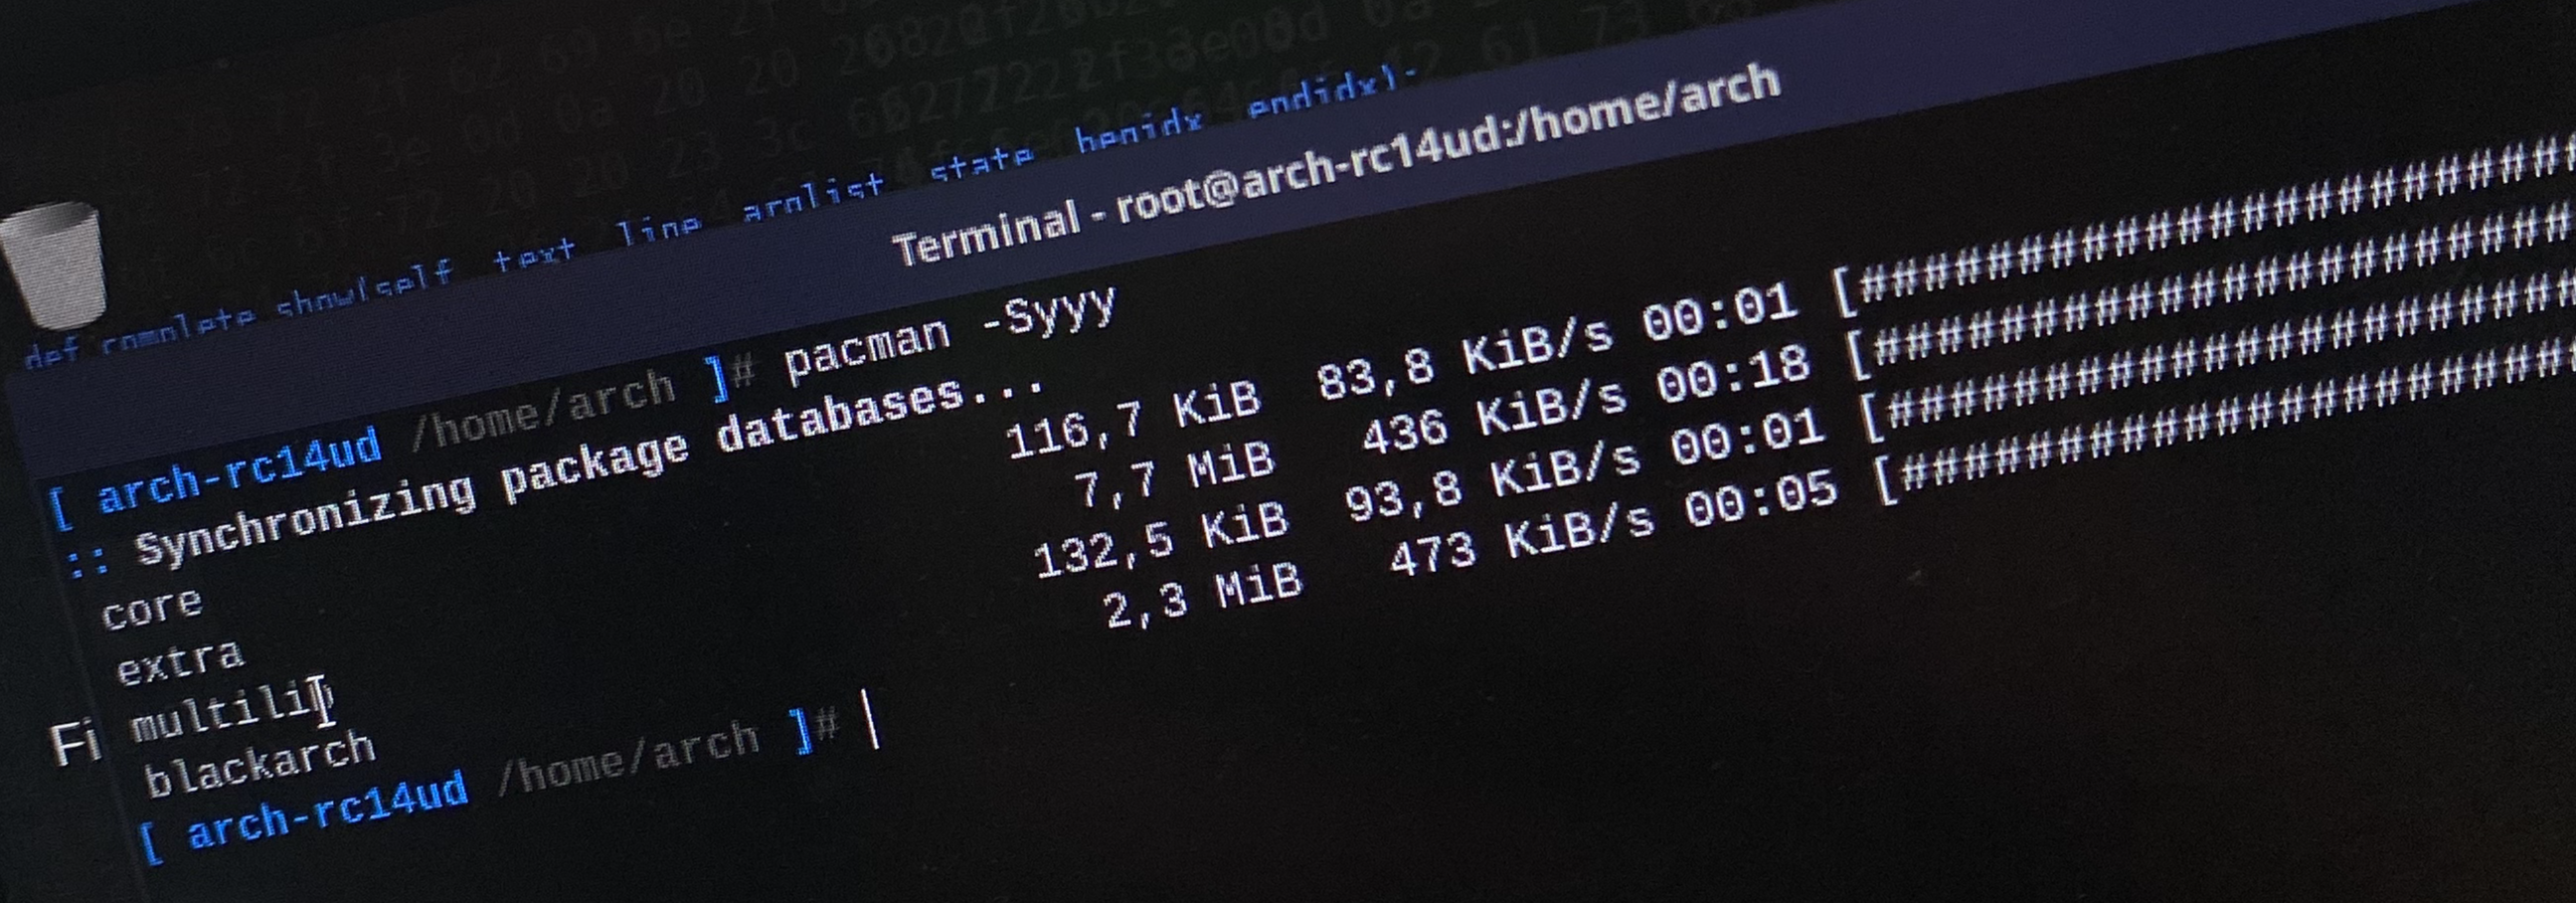
After commenting out those lines, you should be able to update the packages:
BlackArch is now installed on a USB with persistence. Enjoy.
Why don’t we install with Internet access?
If we are connected to the Internet, the installation will automatically update packages using pacman. The issue is that pacman is “deprecated” in this case due to the migration in Arch’s old git repositories. Therefore, it’s better to install without an Internet connection and resolve the pacman issue afterward.
See Arch Linux News for more information.
Why don’t we install using the “Erase disk” option?
If we use this option, the installation will get stuck at 4% when creating the root partition. For this reason, it’s always better to do it manually.
